Quick Links
After an epic journey through the various quests and dungeons in Dragon Quest 3 Remake, players face their ultimate challenge in Zoma's Citadel. This final dungeon tests your skills to the limit, demanding that you utilize every tactic and strategy learned throughout the game. It's the most challenging part of the main storyline in DQ3 Remake. This comprehensive guide will walk you through Zoma's Citadel, detailing the path forward and highlighting all the treasures you can find.
How to Reach Zoma's Citadel in Dragon Quest 3 Remake
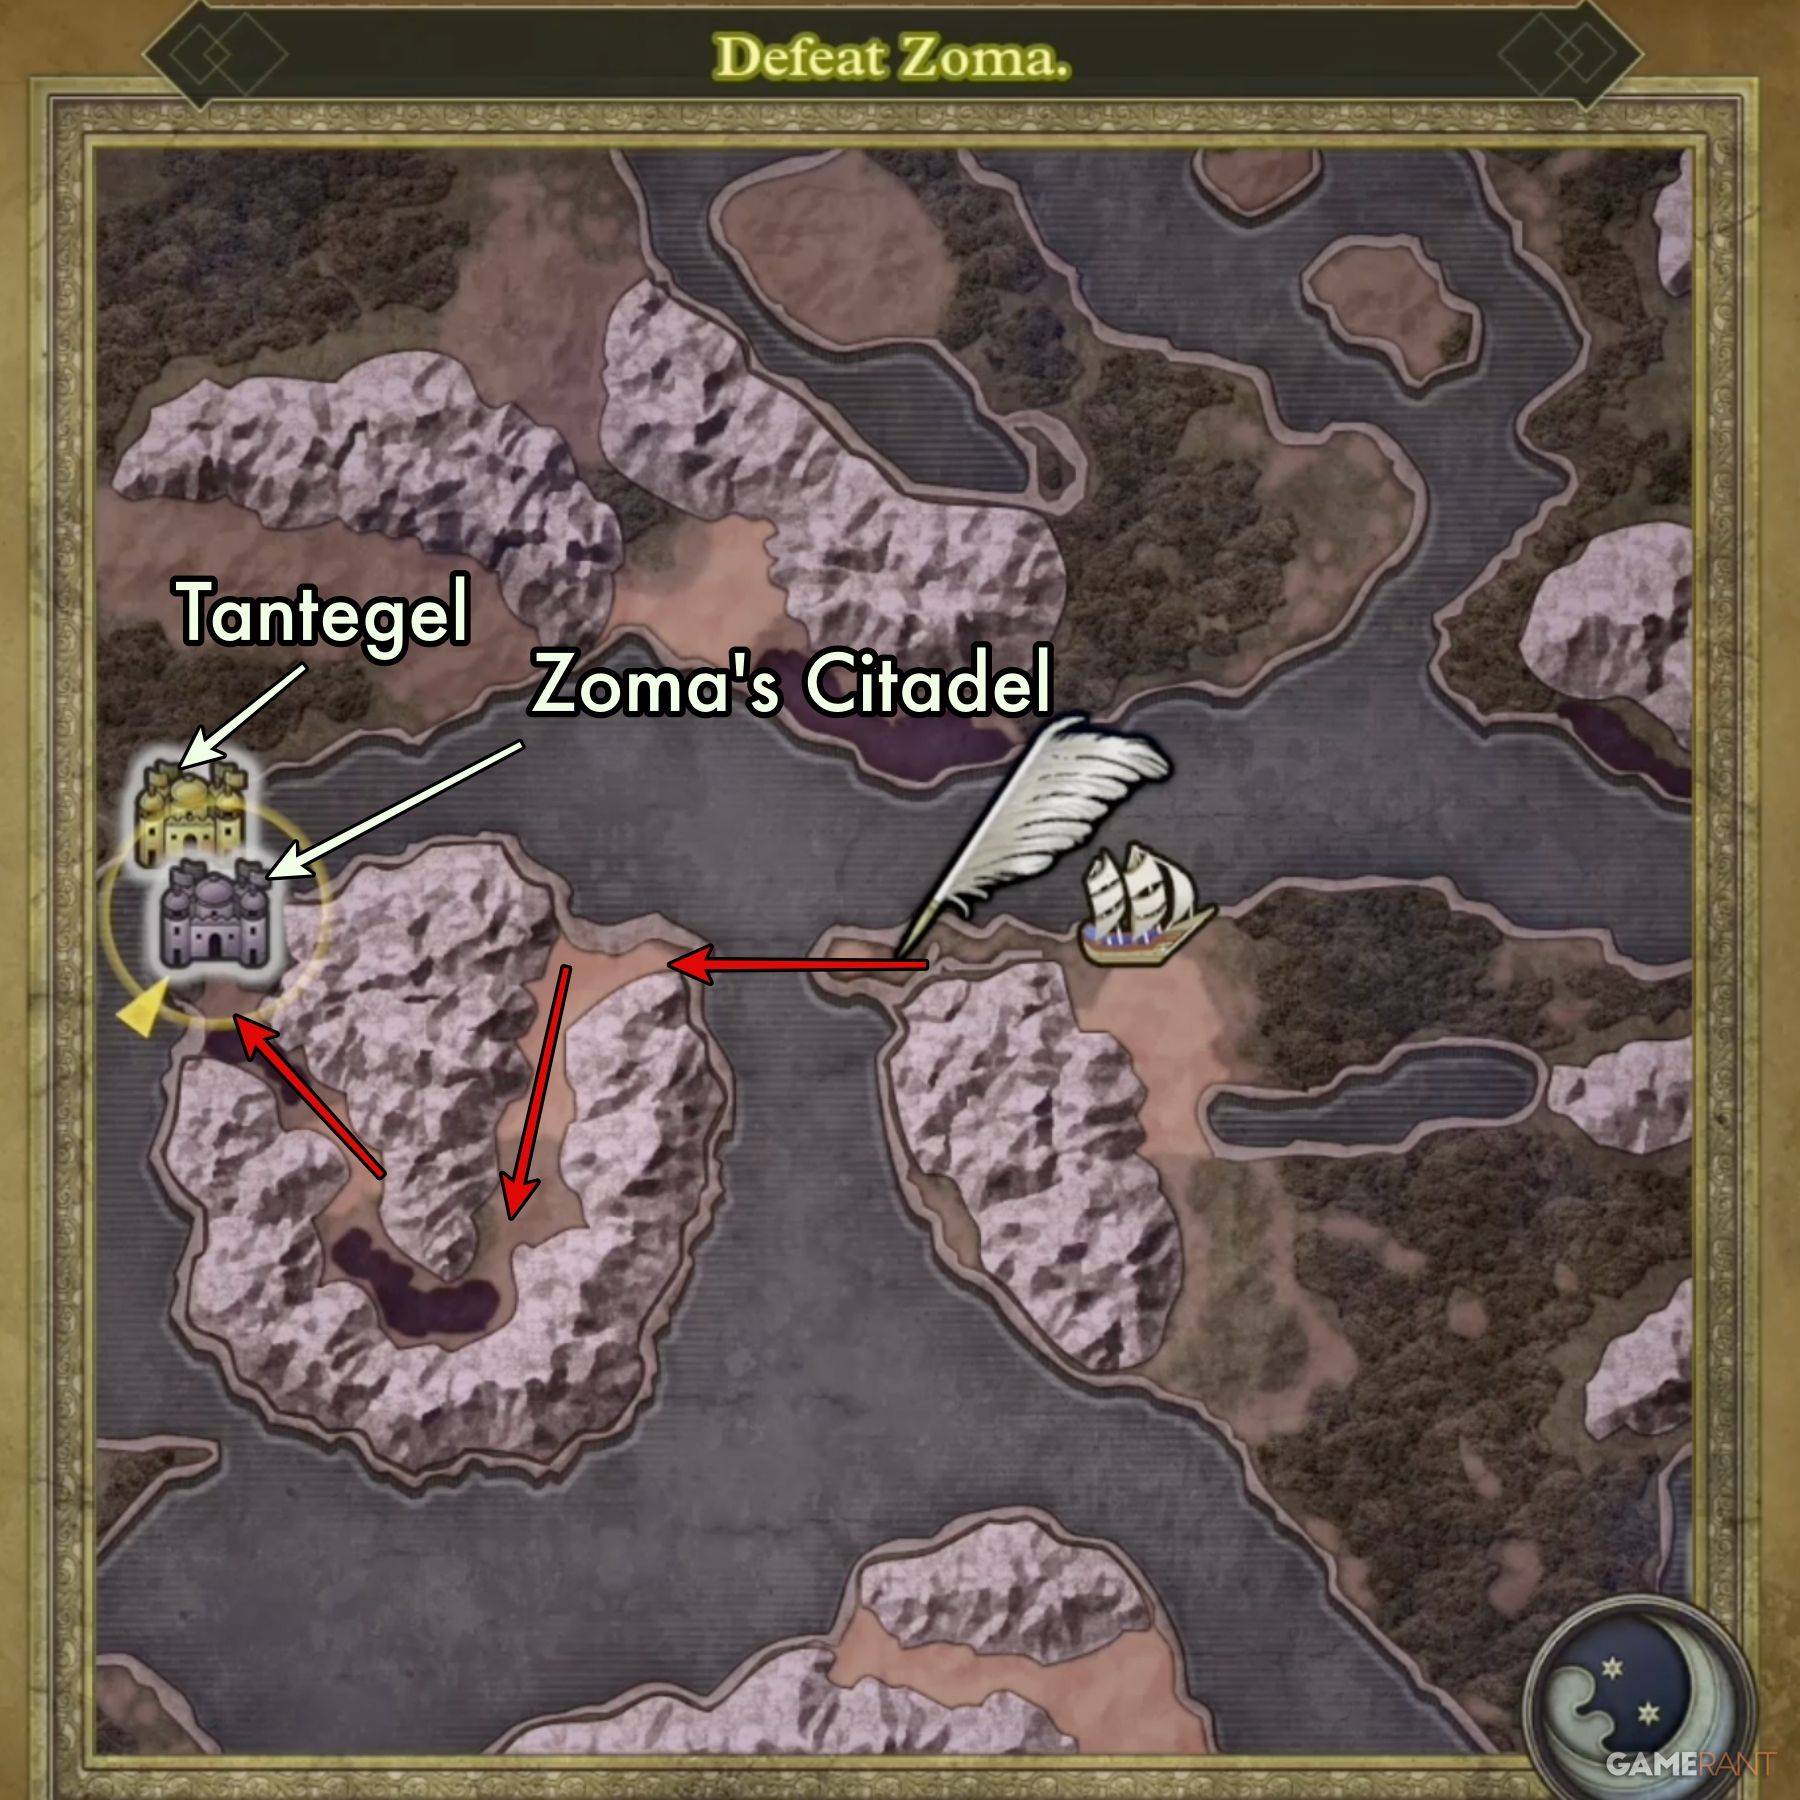 Once you've defeated the Archfiend Baramos, you'll find yourself in the perpetually dark world of Alefgard. Your final destination, Zoma's Citadel, lies ahead, but you'll need to assemble the Rainbow Drop first.
The Rainbow Drop is crafted from three key items:
- Sunstone – Found in Tantegel Castle
- Staff of Rain – Located in the Shrine of the Spirit
- Sacred Amulet – Awarded by Rubiss after liberating her at the top of the Tower of Rubiss (requires the Faerie Flute)
Once you've gathered these items, you can create the Rainbow Drop, which will enable you to build the Rainbow Bridge leading directly to Zoma's Citadel.
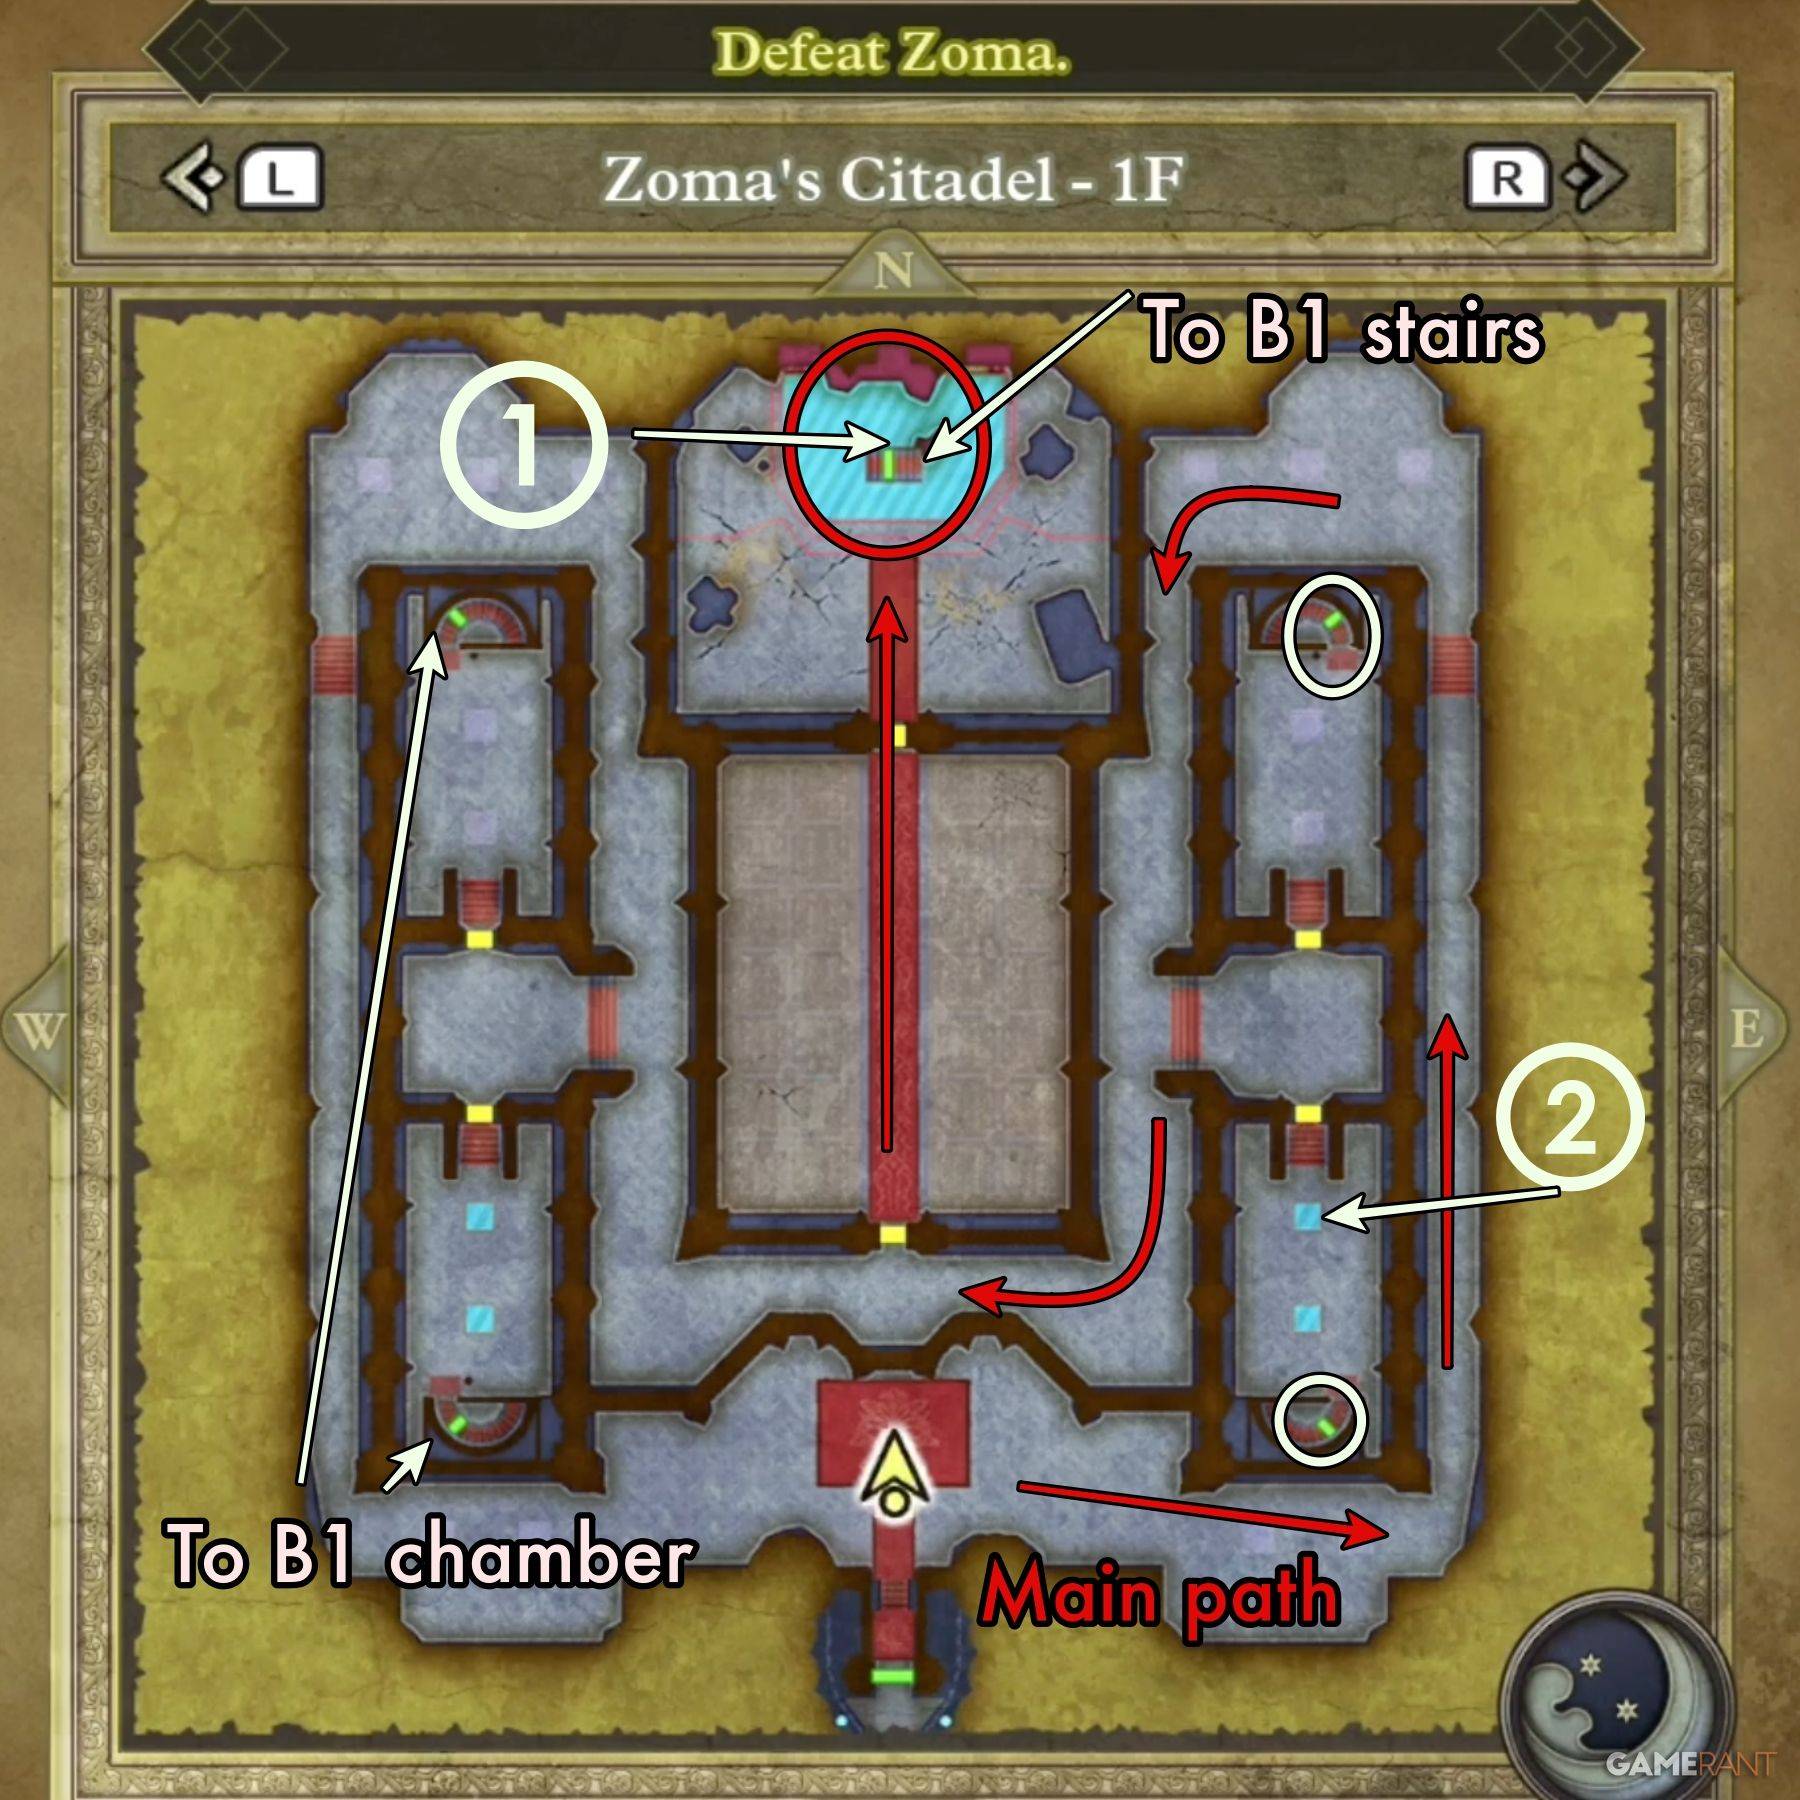
Zoma's Citadel 1F Walkthrough – Dragon Quest 3 Remake
 ### 1F Main Path:
Your objective on the first floor is to reach the throne against the northern wall, which will shift to unveil a secret passage. Navigate up and around the east or west side of the chamber, then return to the door of the central chamber. Refer to the map above for the precise route. Don't miss the treasures hidden in the side chambers, listed below.
Upon entering the central chamber, be prepared for an onslaught of Living Statue variants. These enemies are tough and have no significant weaknesses, so approach them as you would a boss battle.
All Treasure on Zoma's Citadel 1F:
- Treasure 1 (Buried): Mini Medal – behind the throne.
- Treasure 2 (Buried): Seed of Magic – check the electrified panel.
Zoma's Citadel B1 Walkthrough – Dragon Quest 3 Remake
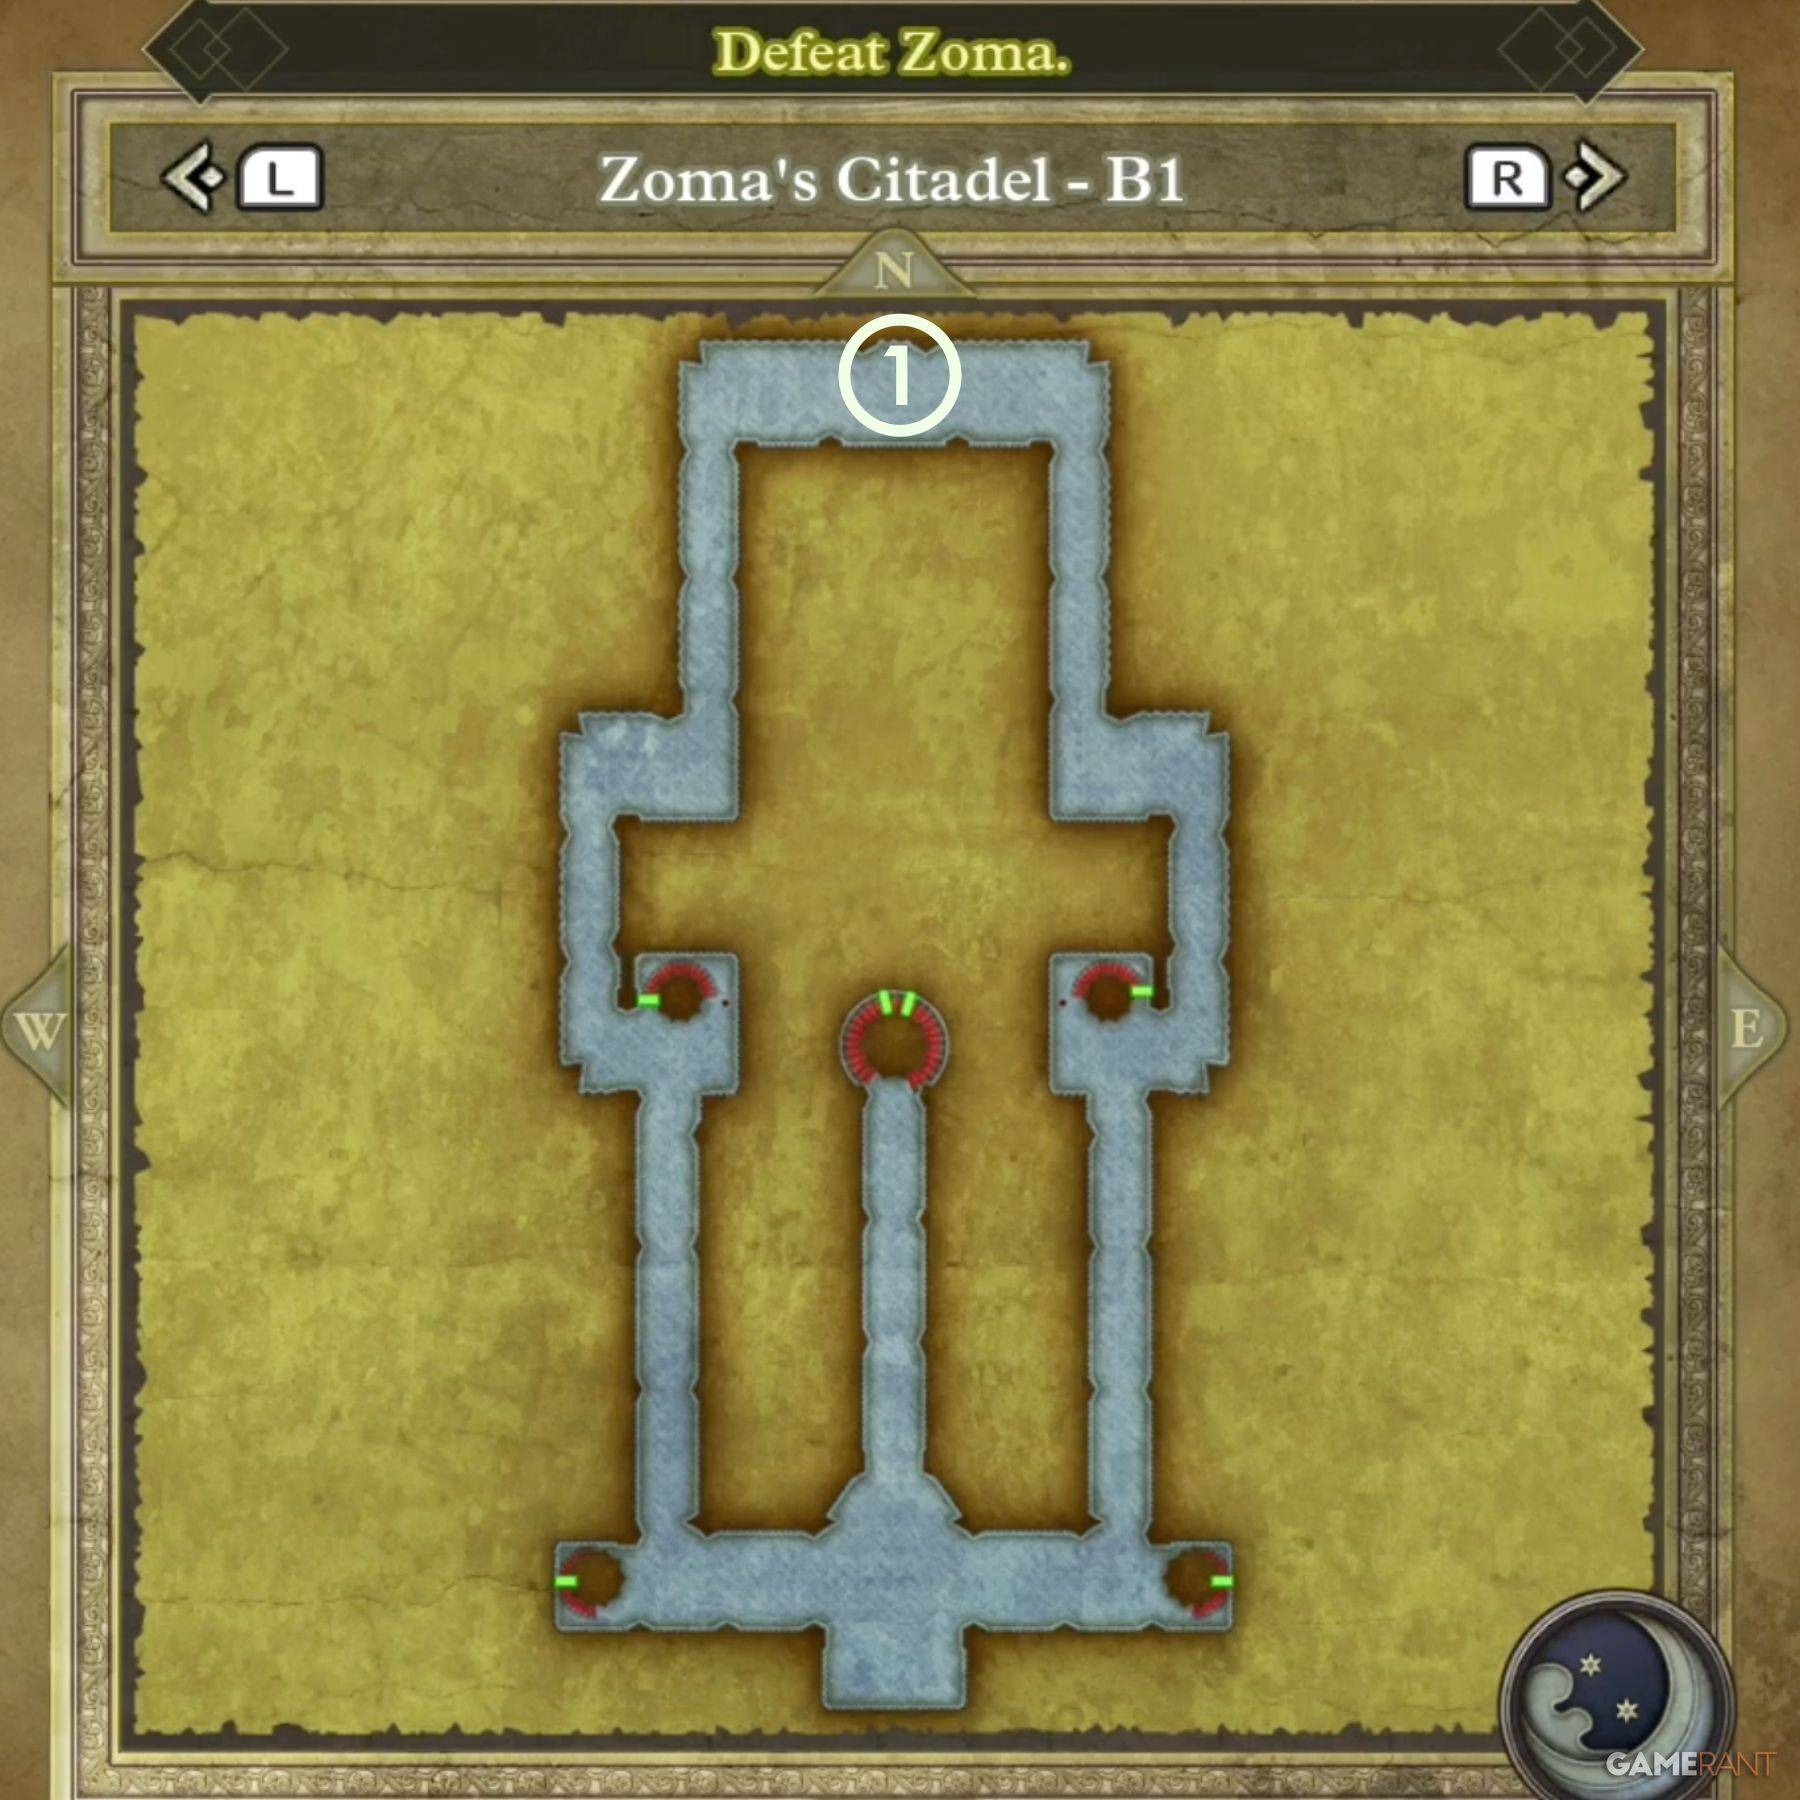 ### B1 Main Path and B1 Treasure:
The main path under the throne leads directly to B2. However, if you explore the four stair sets in the small chambers on 1F, you'll access the isolated B1 chamber. The sole purpose of venturing here is to claim the treasure chest along the northern wall:
- Treasure 1 (Chest): Hapless Helm
Zoma's Citadel B2 Walkthrough – Dragon Quest 3 Remake
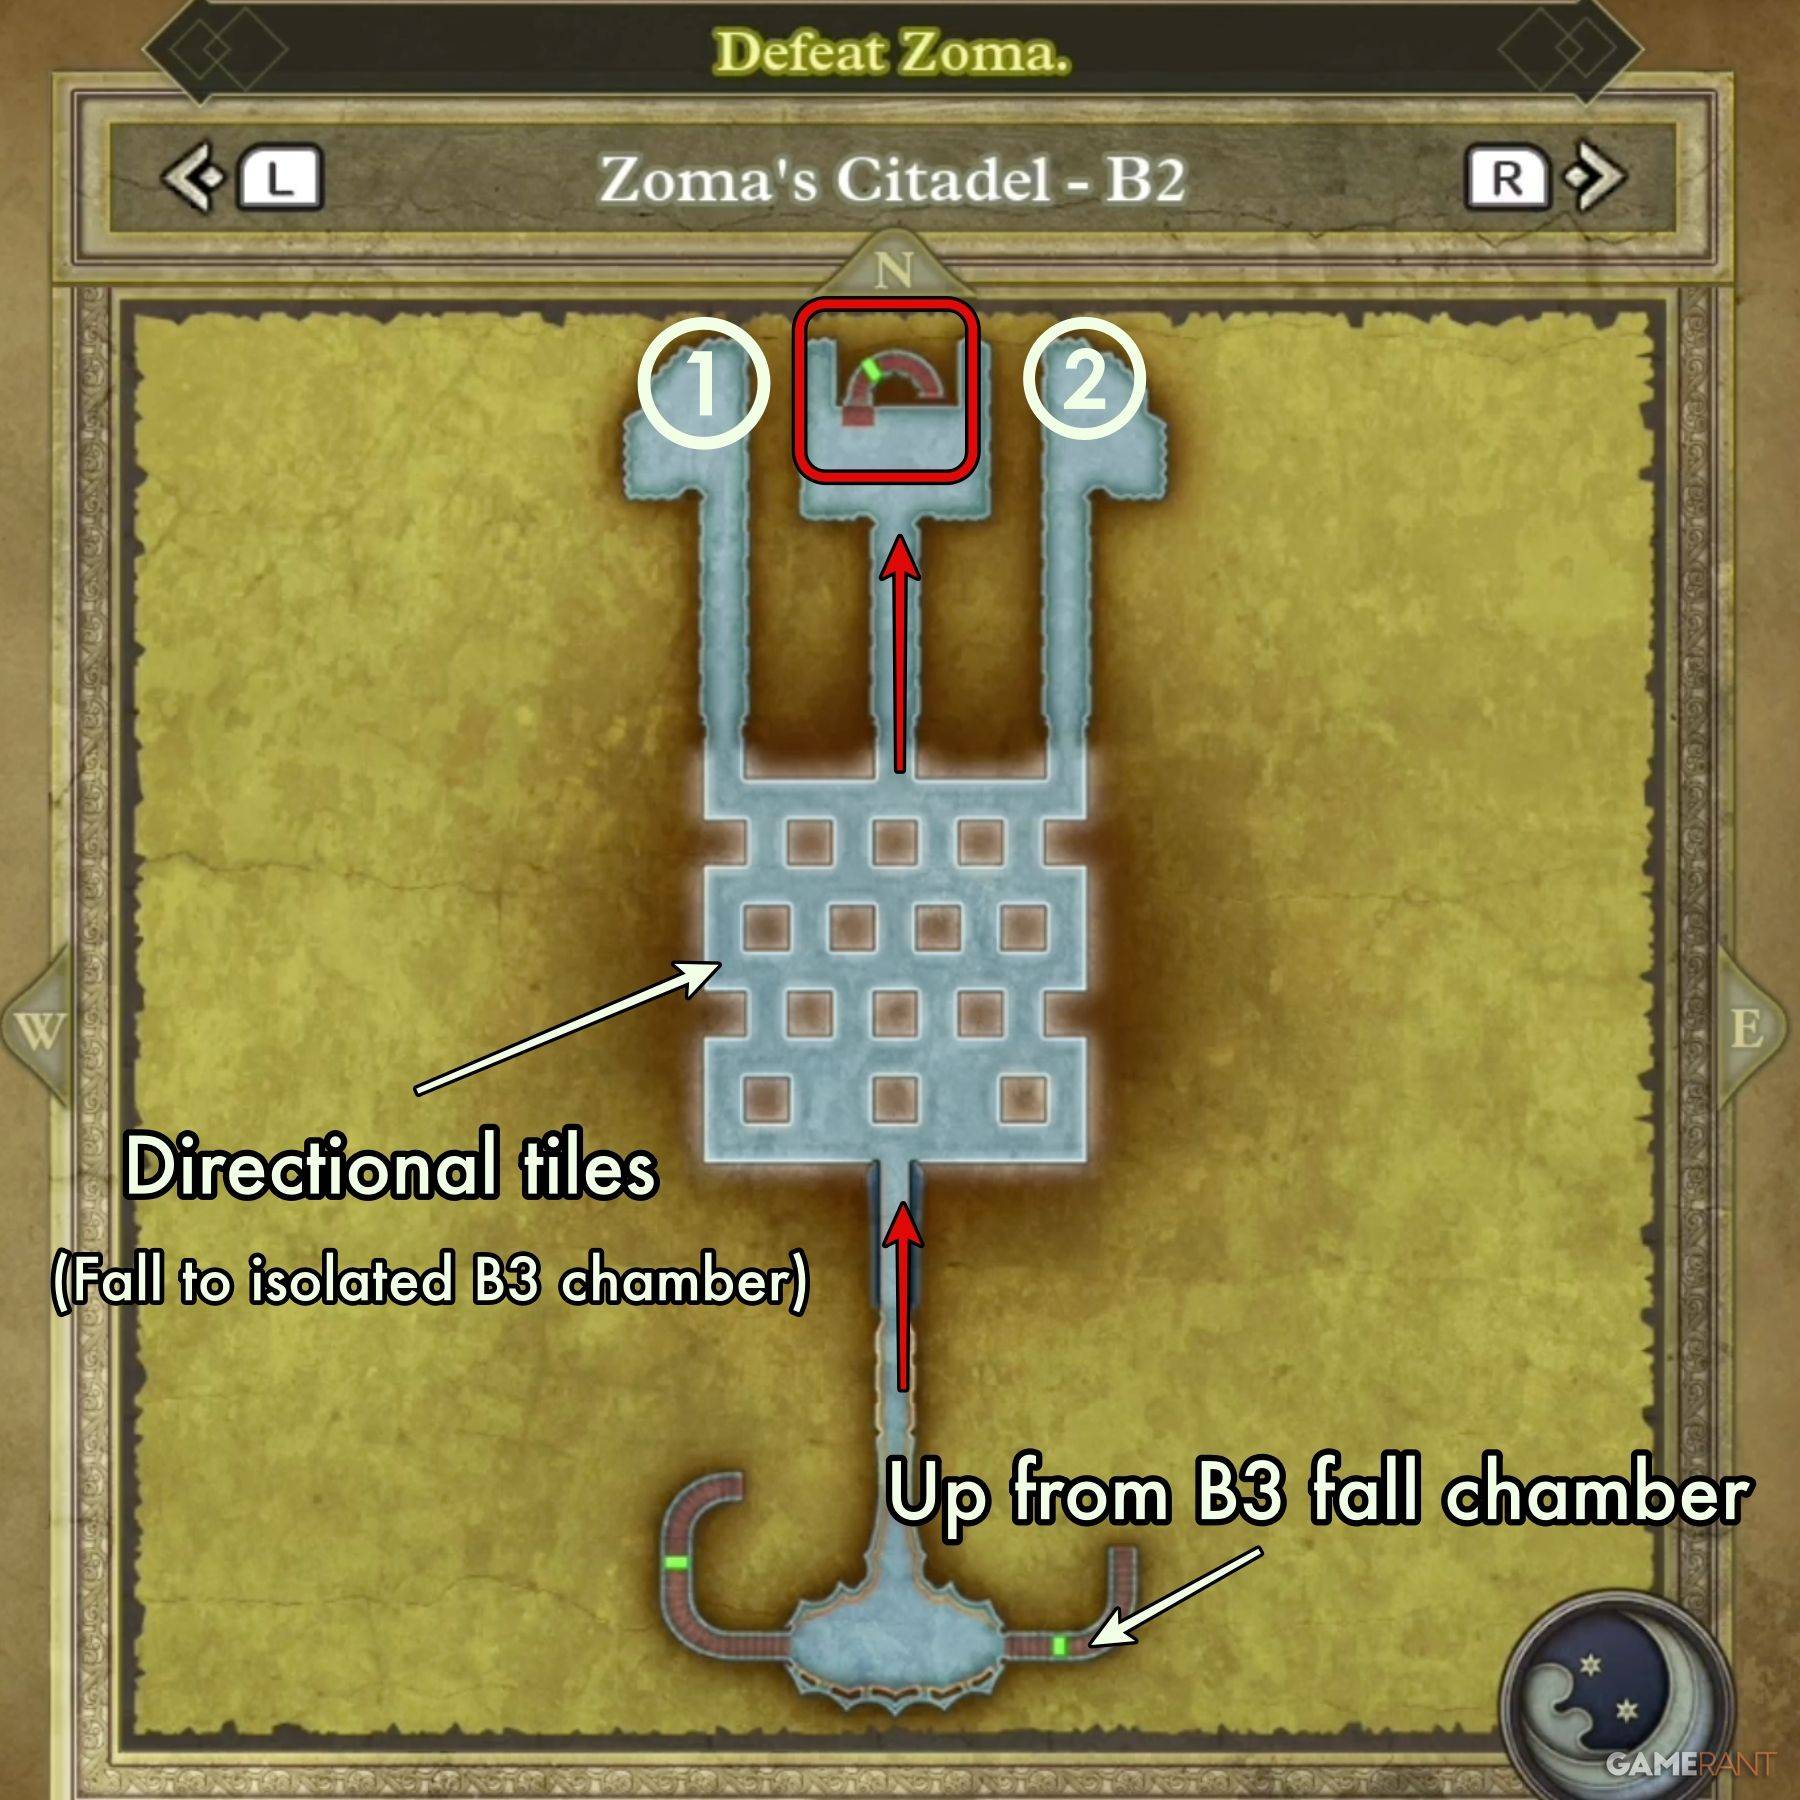 ### B2 Main Path:
Upon descending from B1, you'll find yourself on B2. Your challenge here is to navigate the directional tiles in the central area to reach the path opposite the entrance, then proceed down the stairs. These tiles can be tricky, so we've dedicated a section to mastering them.
How to Use the Directional Tiles in Dragon Quest 3 Remake:
Mastering the directional tiles on level B2 can be a challenge, but there's a method to their madness. For practice, consider revisiting the Tower of Rubiss, where similar tiles are located on the third floor's northwest corner.
The tiles are diamond-shaped, with colors that change frequently. Here's how to navigate them:
When moving North or South, think of the diamond halves as the left and right D-Pad buttons:
- Blue = North - If the blue half is on the left, press left to move north; if on the right, press right to move north.
- Orange = South - Similarly, if orange is on the left, press left to move south; if on the right, press right to move south.
For East or West movement, focus on the orange arrow:
- If the orange arrow points toward your desired direction, press UP on the D-Pad. If it points away, press DOWN.
All Treasure on Zoma's Citadel B2:
- Treasure 1 (Chest): Scourge Whip
- Treasure 2 (Chest): 4,989 Gold Coins
Zoma's Citadel B3 Walkthrough – Dragon Quest 3 Remake
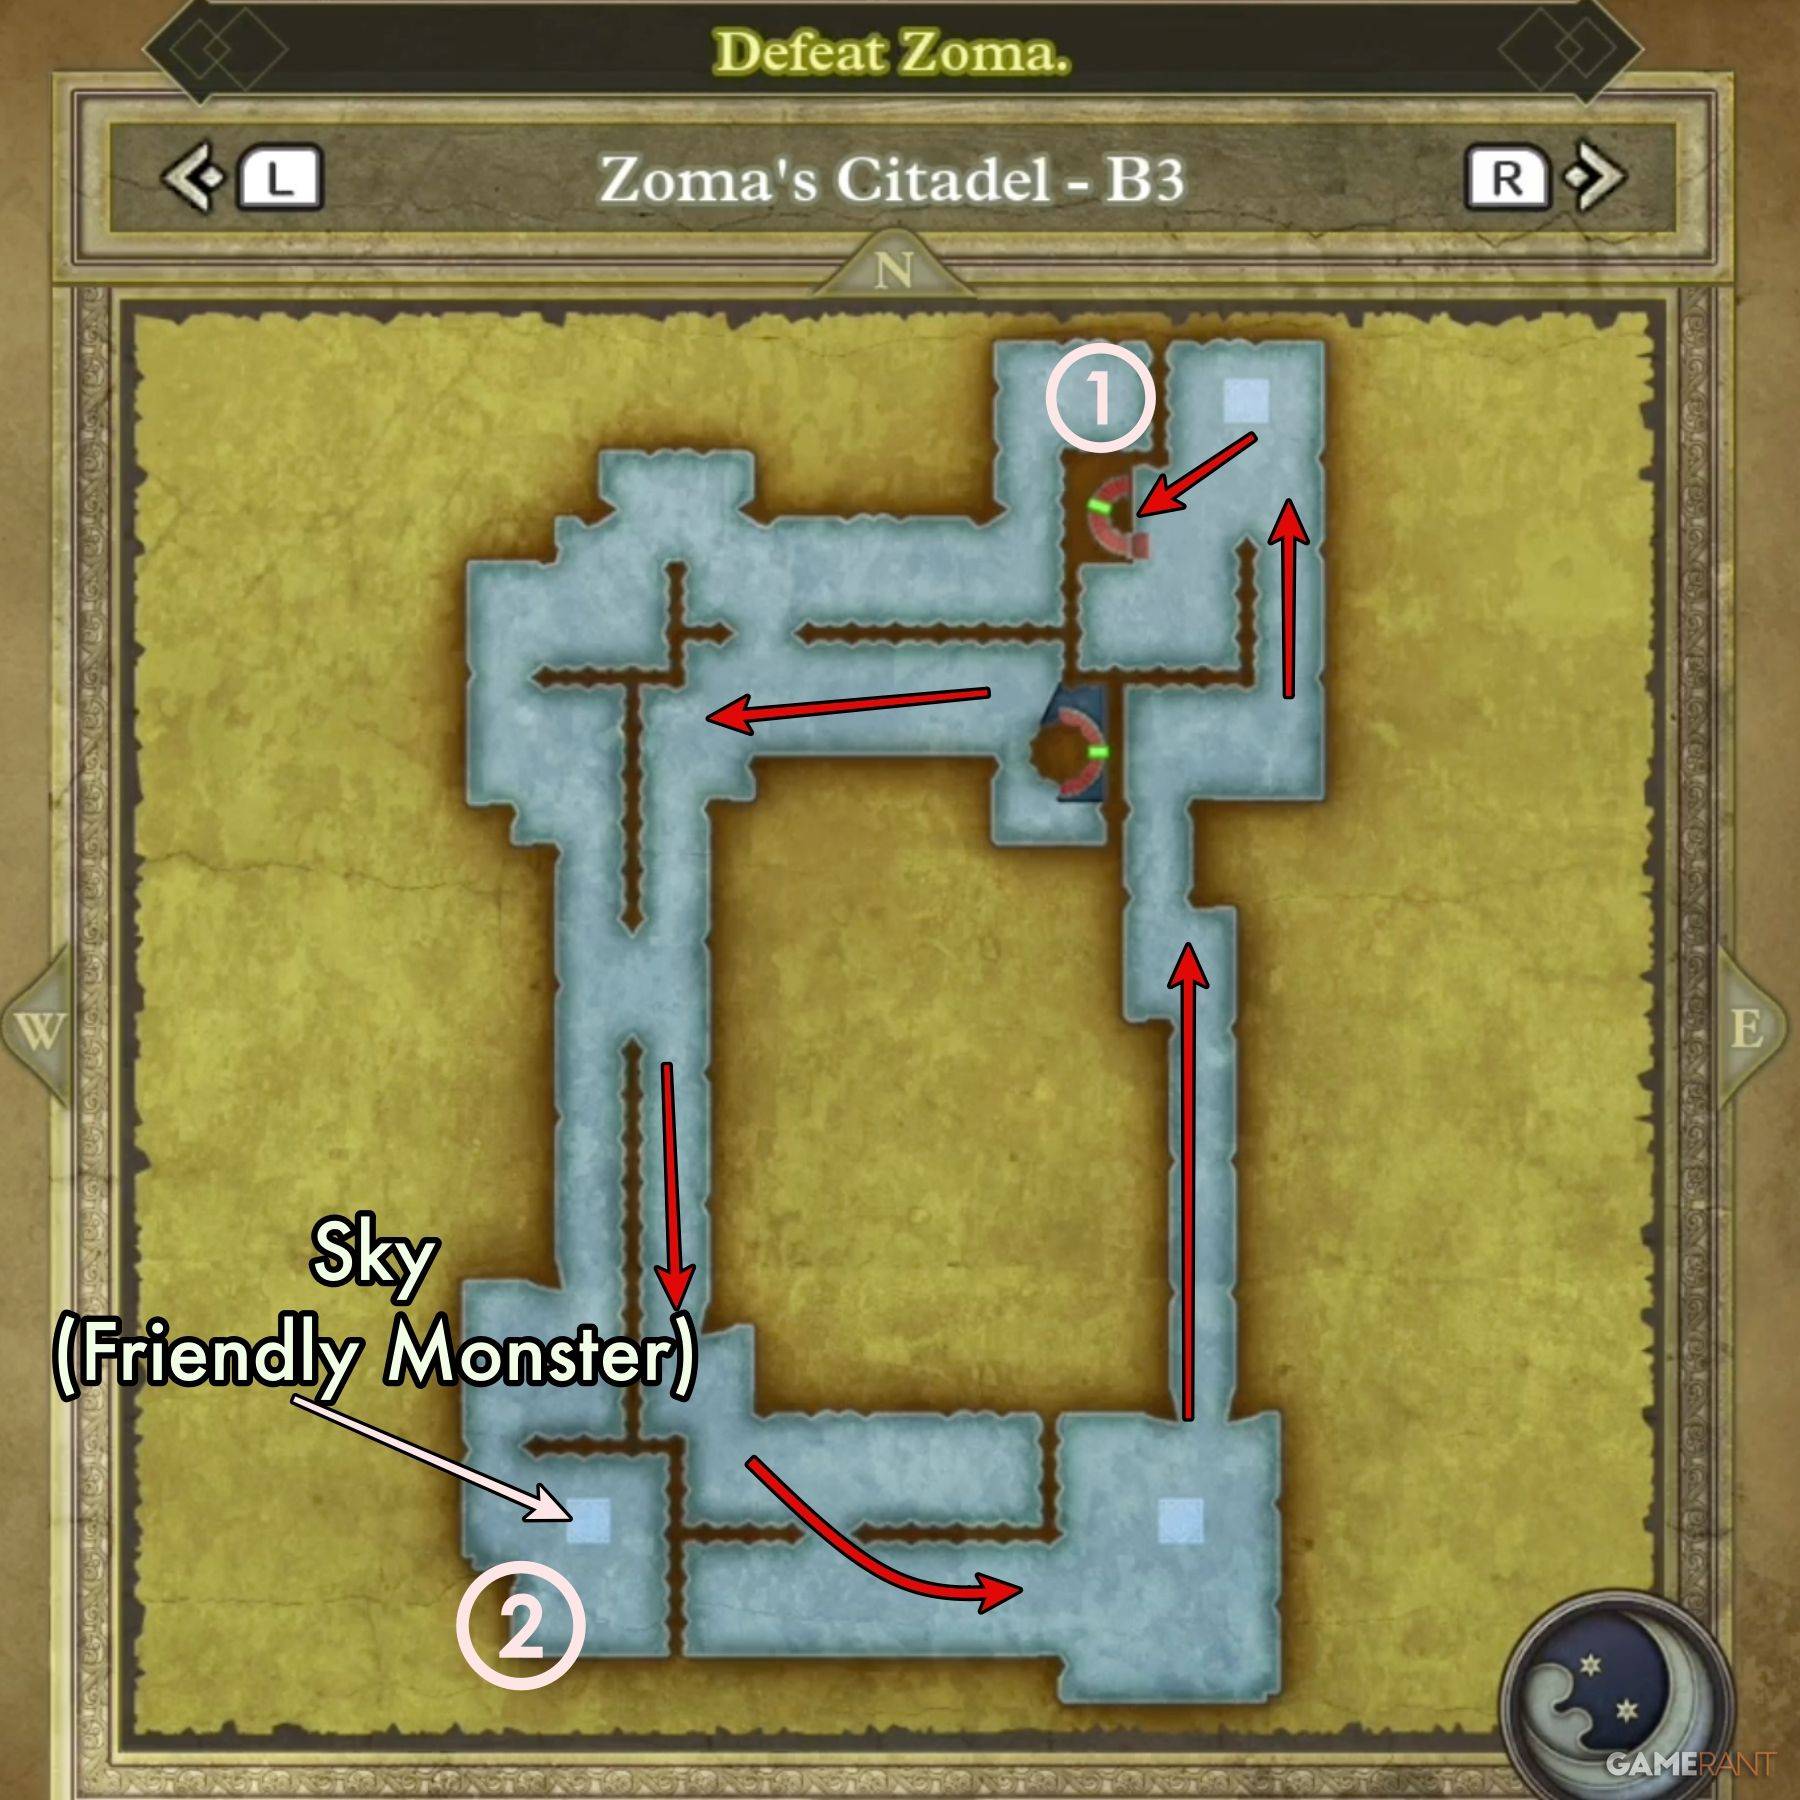 ### B3 Main Path:
Navigating B3 is straightforward; follow the outer edge of the square-shaped chamber. A detour to the southwest corner reveals Sky, a Soaring Scourger, and a Friendly Monster from DQIII Remake.
B3 Isolated Chamber:
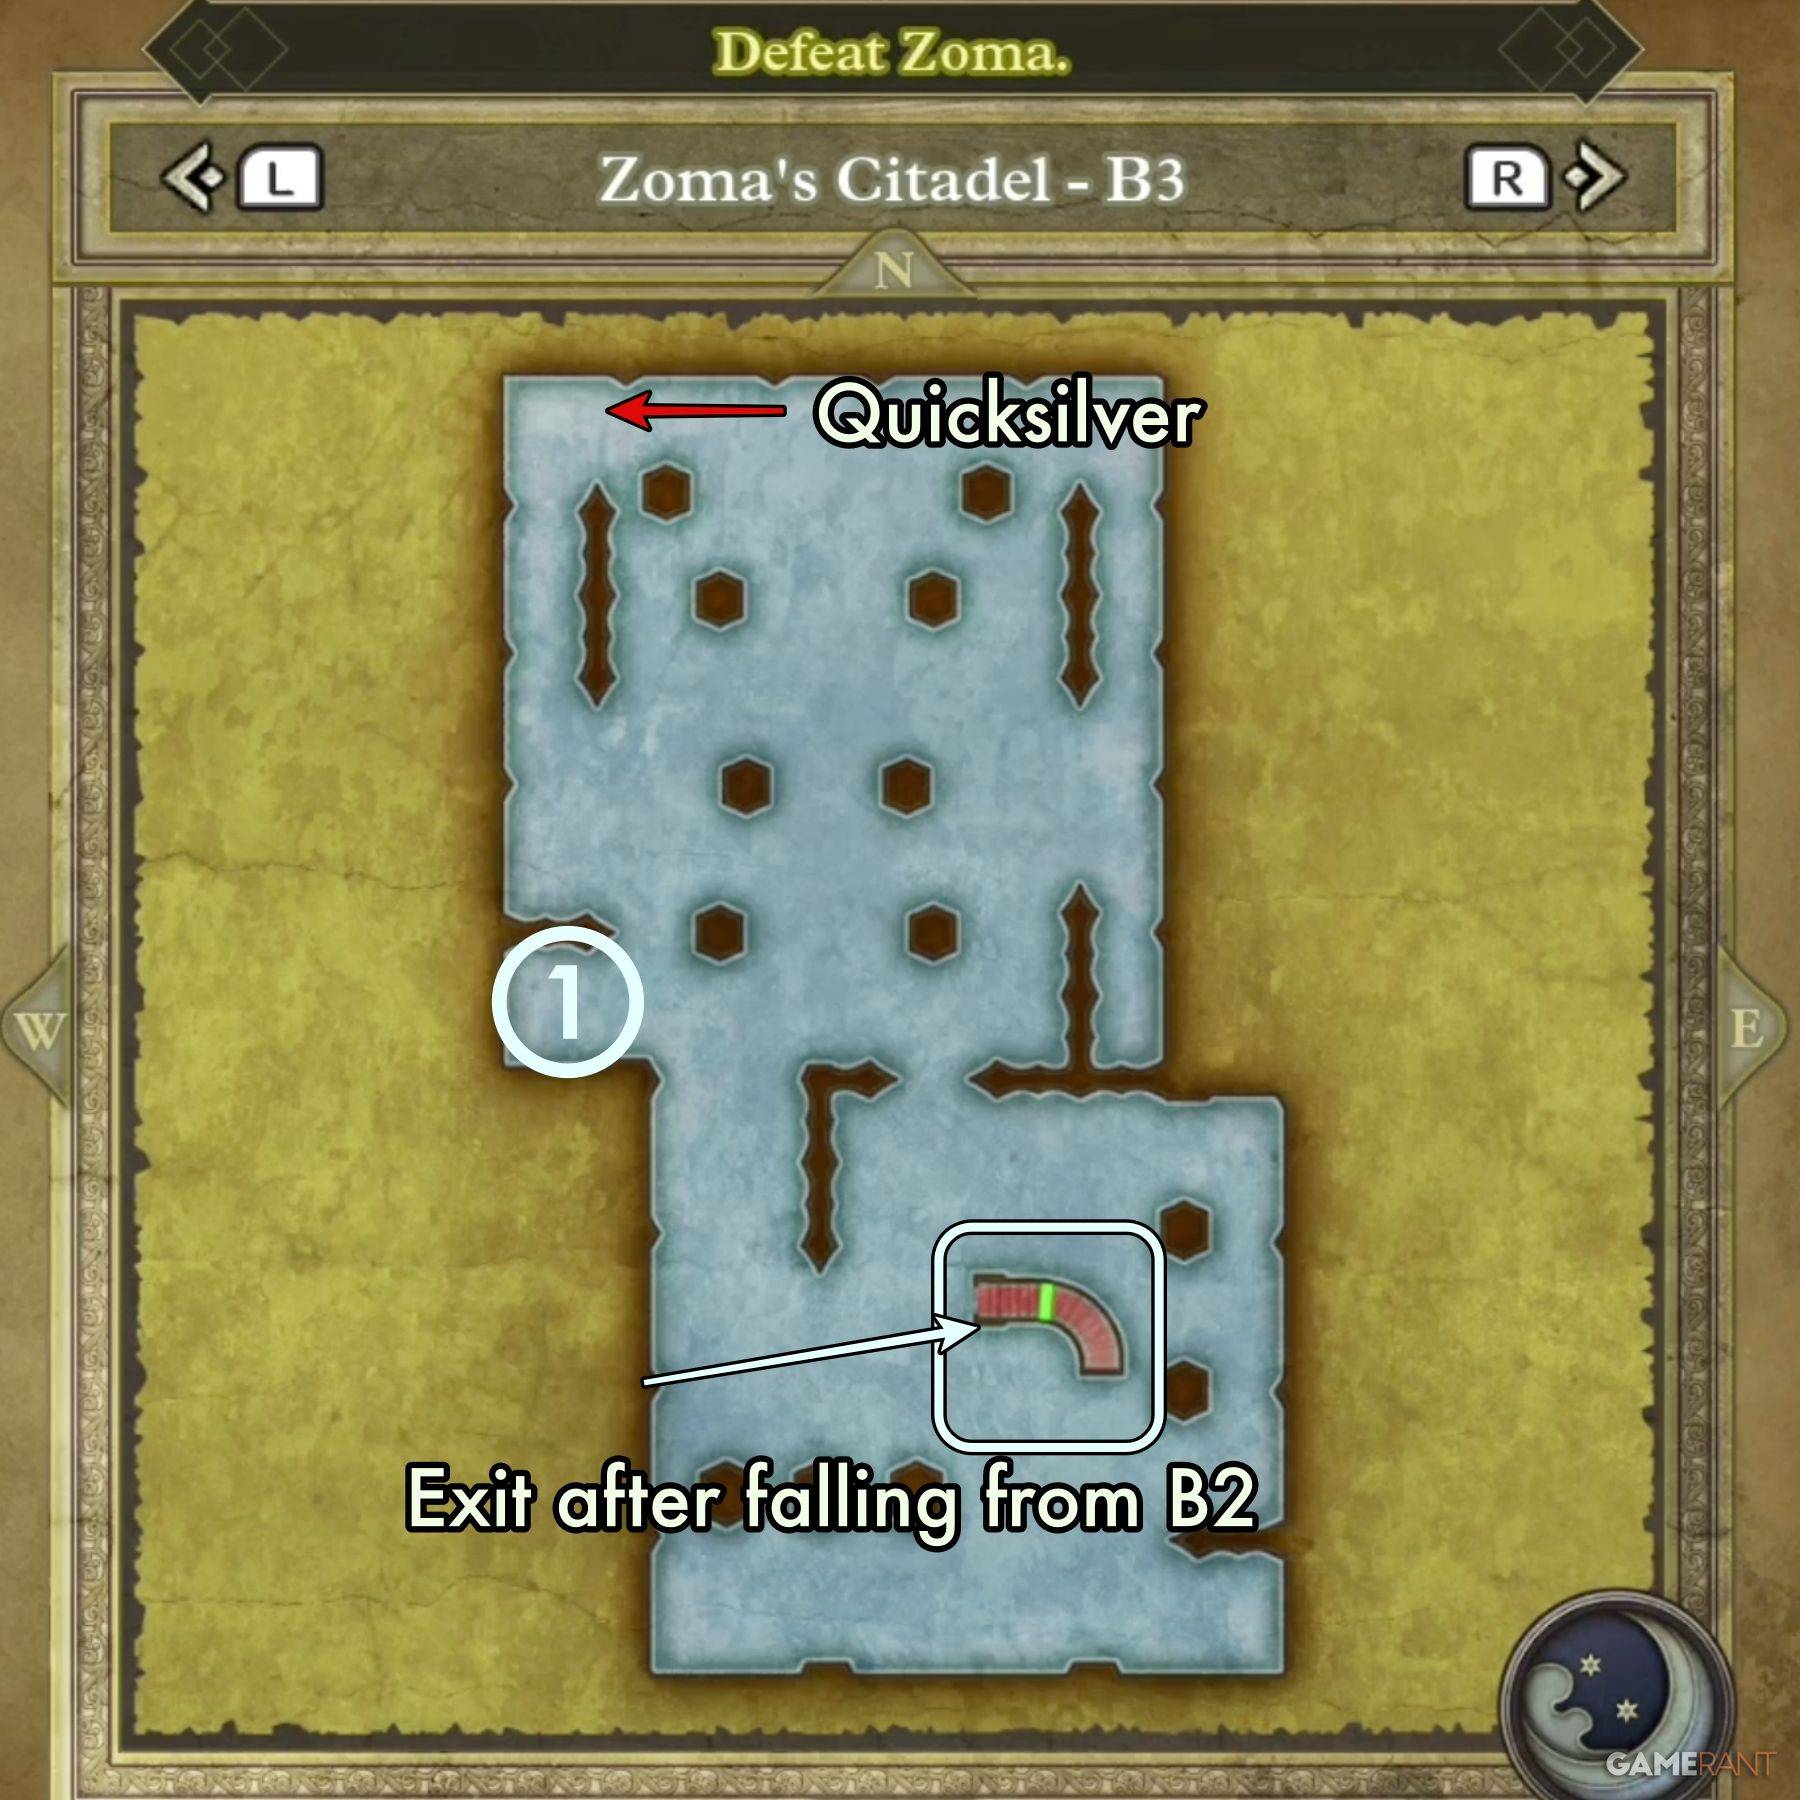 If you fall into a hole while crossing the directional tiles on B2, you'll land in this isolated section of B3. Here, you'll encounter a friendly Liquid Metal Slime in the northwest corner. Exit via the stairs on the eastern side.
All Treasure on Zoma's Citadel B3:
Main Chamber:
- Treasure 1 (Chest): Dragon Dojo Duds
- Treasure 2 (Chest): Double-Edged Sword
Isolated Chamber:
- Treasure 1 (Chest): Bastard Sword
Zoma's Citadel B4 Walkthrough – Dragon Quest 3 Remake
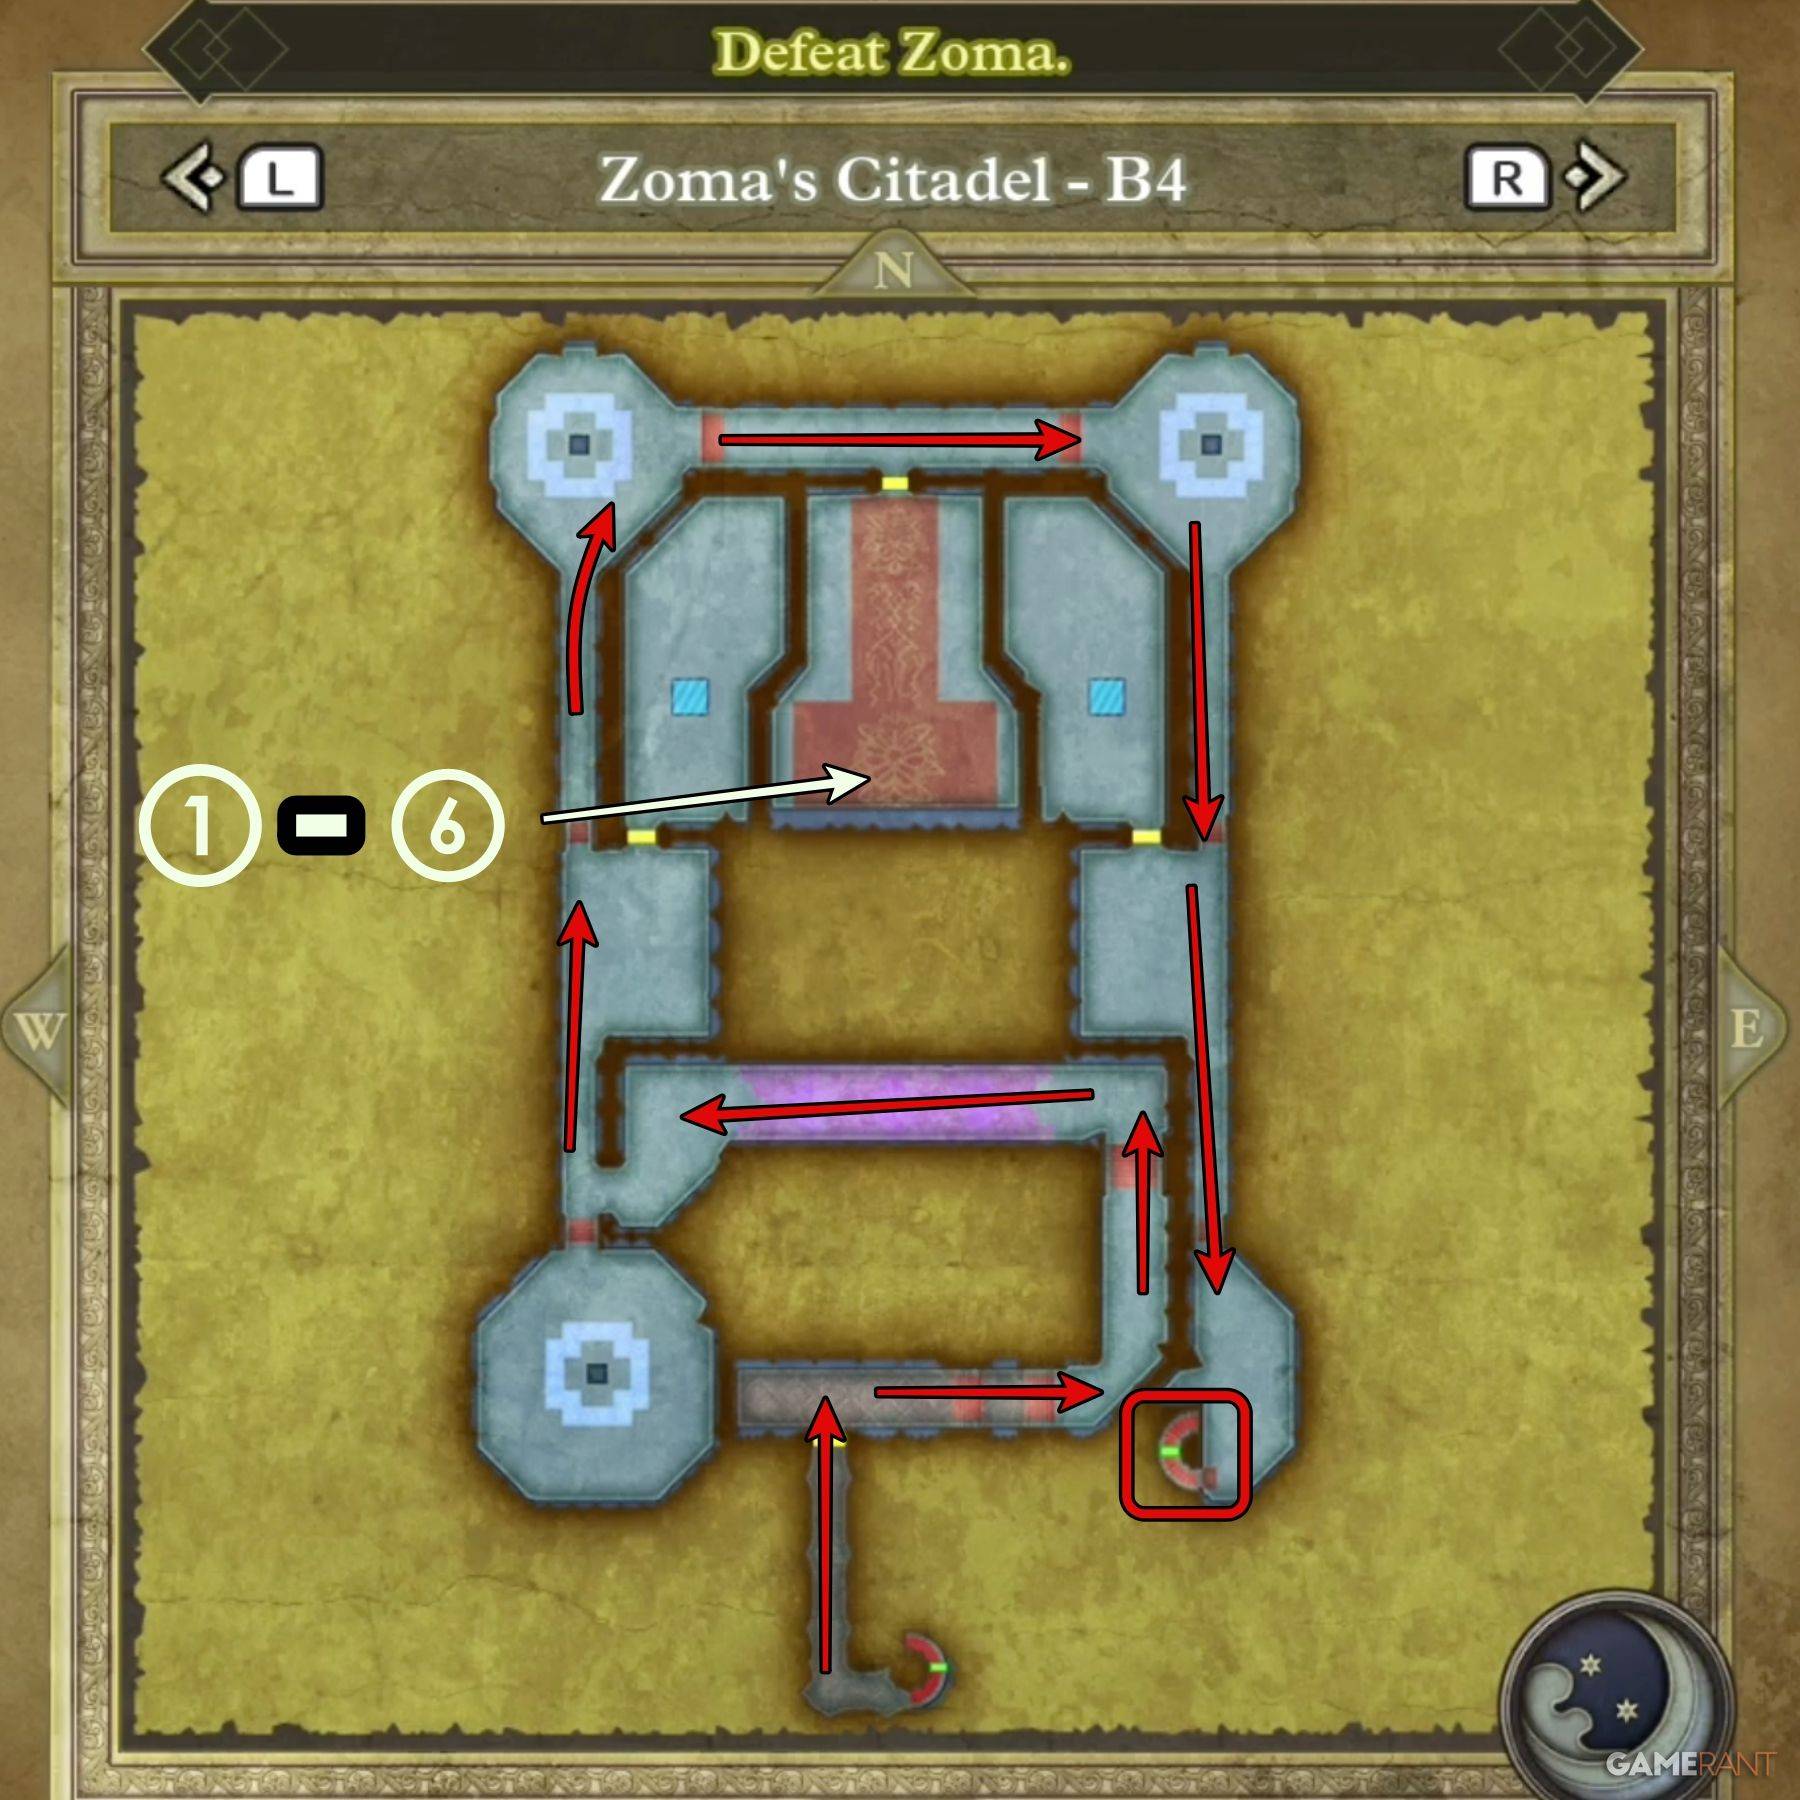 ### B4 Main Path:
The fourth basement level is your last stop before confronting Zoma. Start from the right in the southern center, loop up and around, then descend to the southeastern corner to find the exit.
Don't miss the special cutscene that plays upon entering B4; it's worth watching in full.
All Treasure on Zoma's Citadel B4:
In one chamber, you'll find six chests arranged from right to left:
- Treasure 1 (Chest): Shimmering Dress
- Treasure 2 (Chest): Prayer Ring
- Treasure 3 (Chest): Sage's Stone
- Treasure 4 (Chest): Yggdrasil Leaf
- Treasure 5 (Chest): Dieamend
- Treasure 6 (Chest): Mini Medal
How to Defeat Zoma in Dragon Quest 3 Remake
 Before facing Zoma, you'll need to navigate a boss gauntlet featuring the King Hydra, the Soul of Baramos, and the Bones of Baramos. Fortunately, you can use items from your inventory between battles.
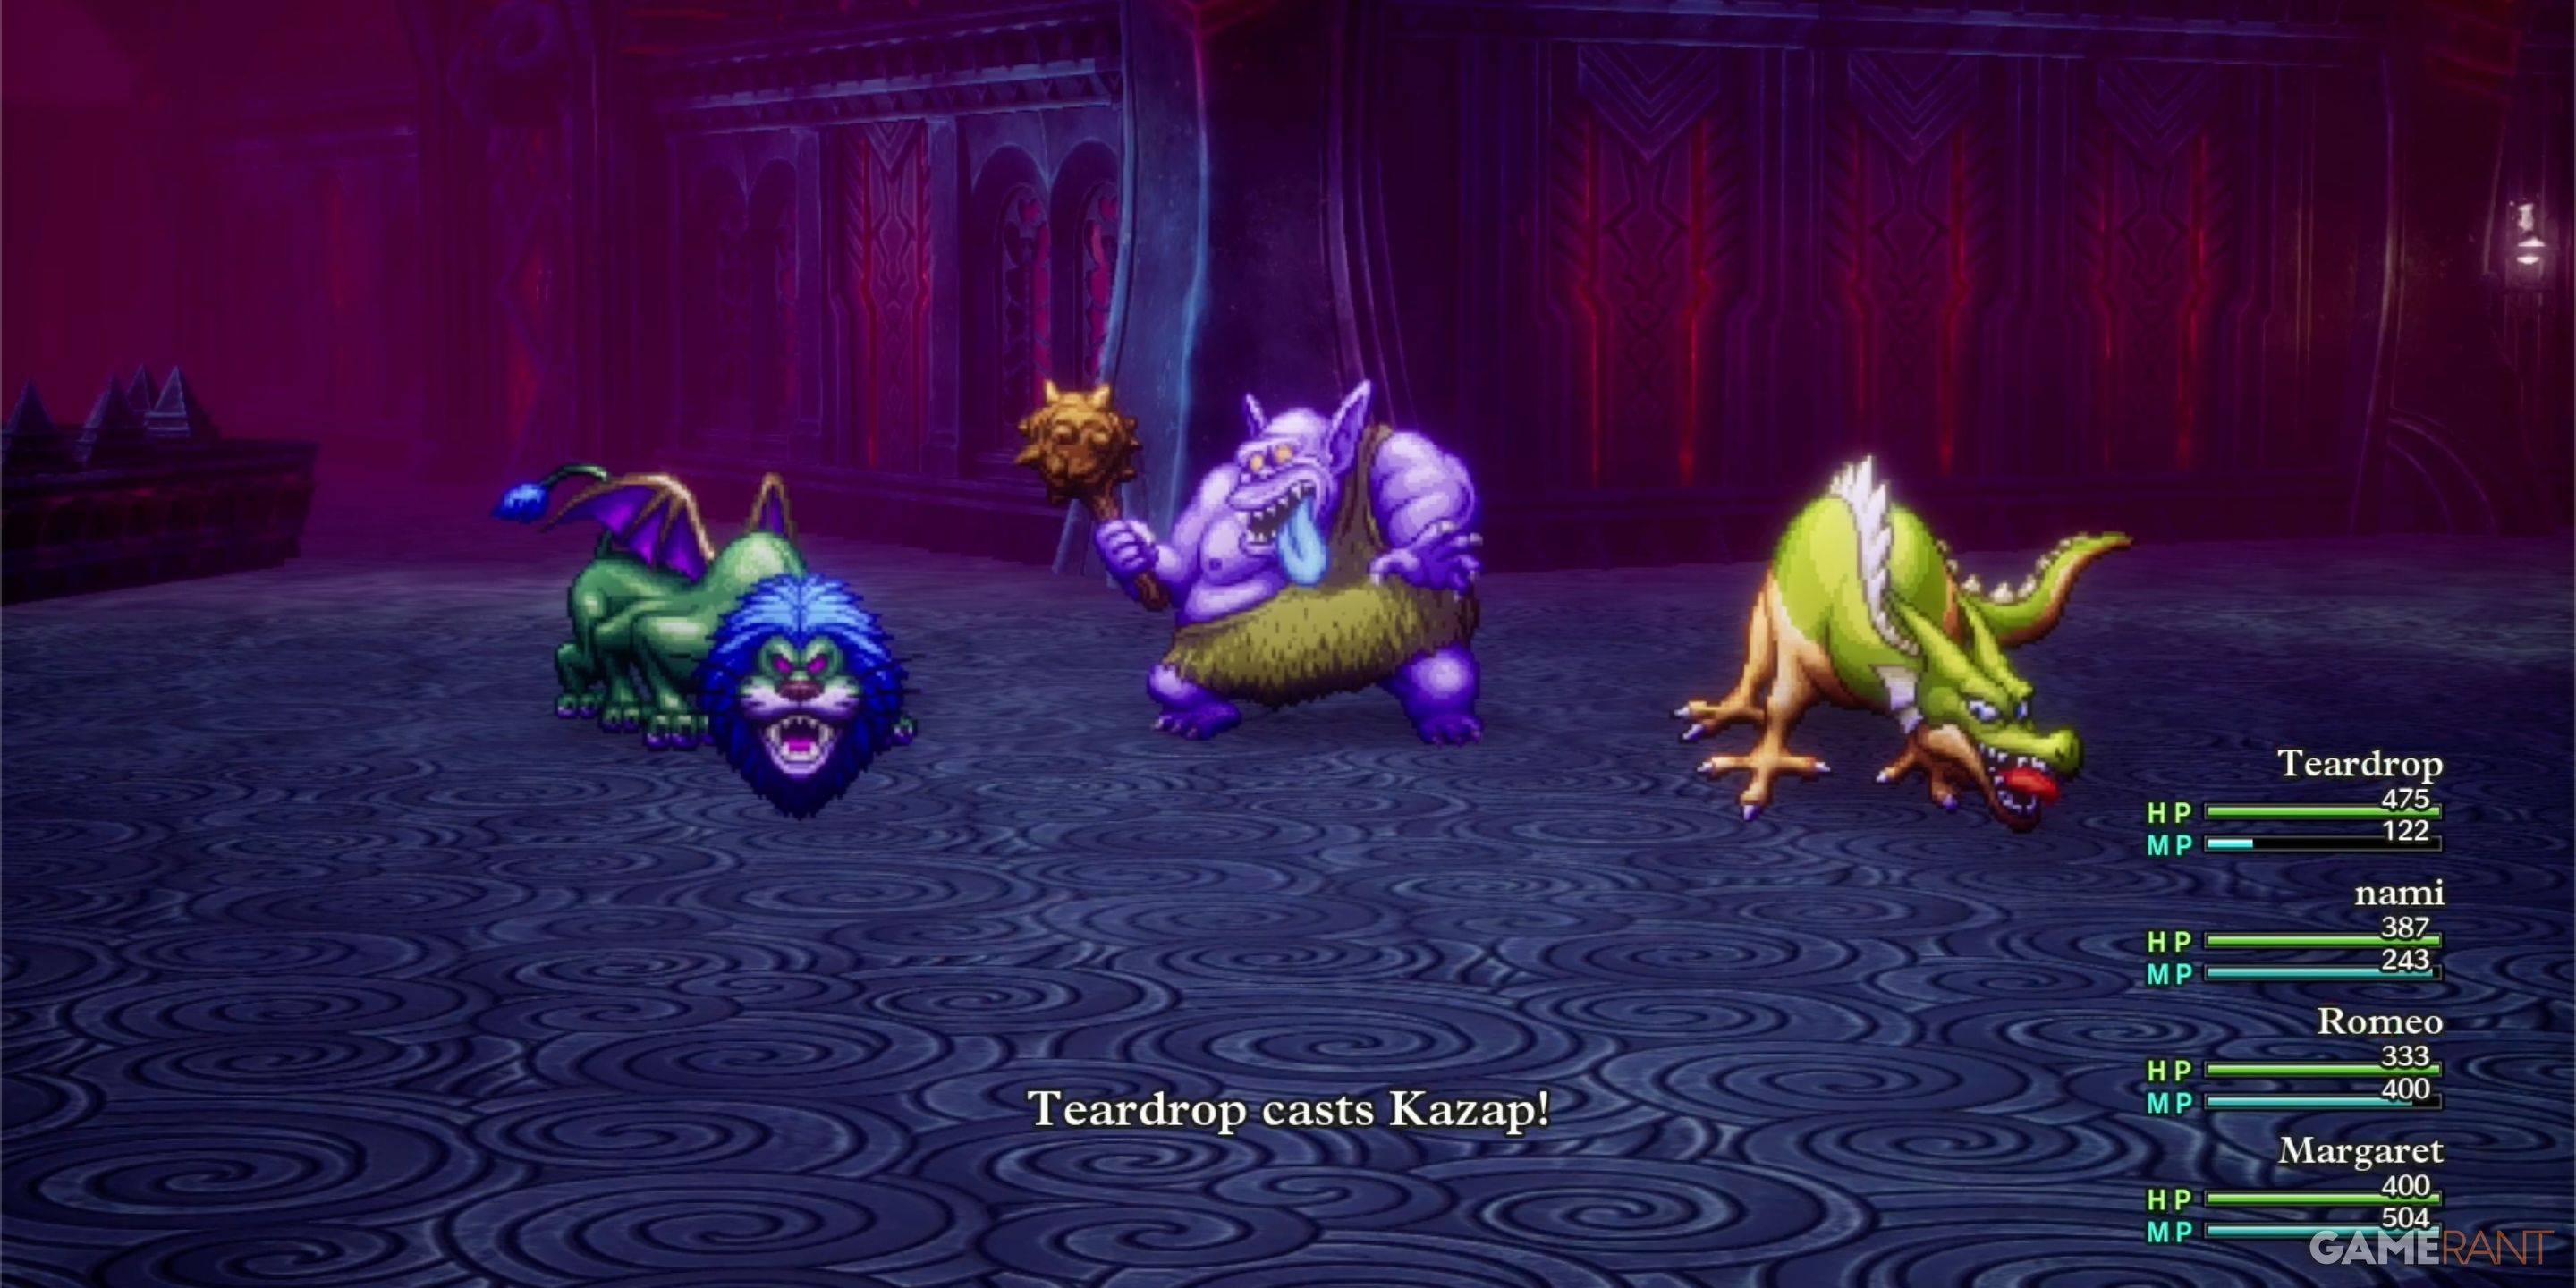
How to Defeat the King Hydra:
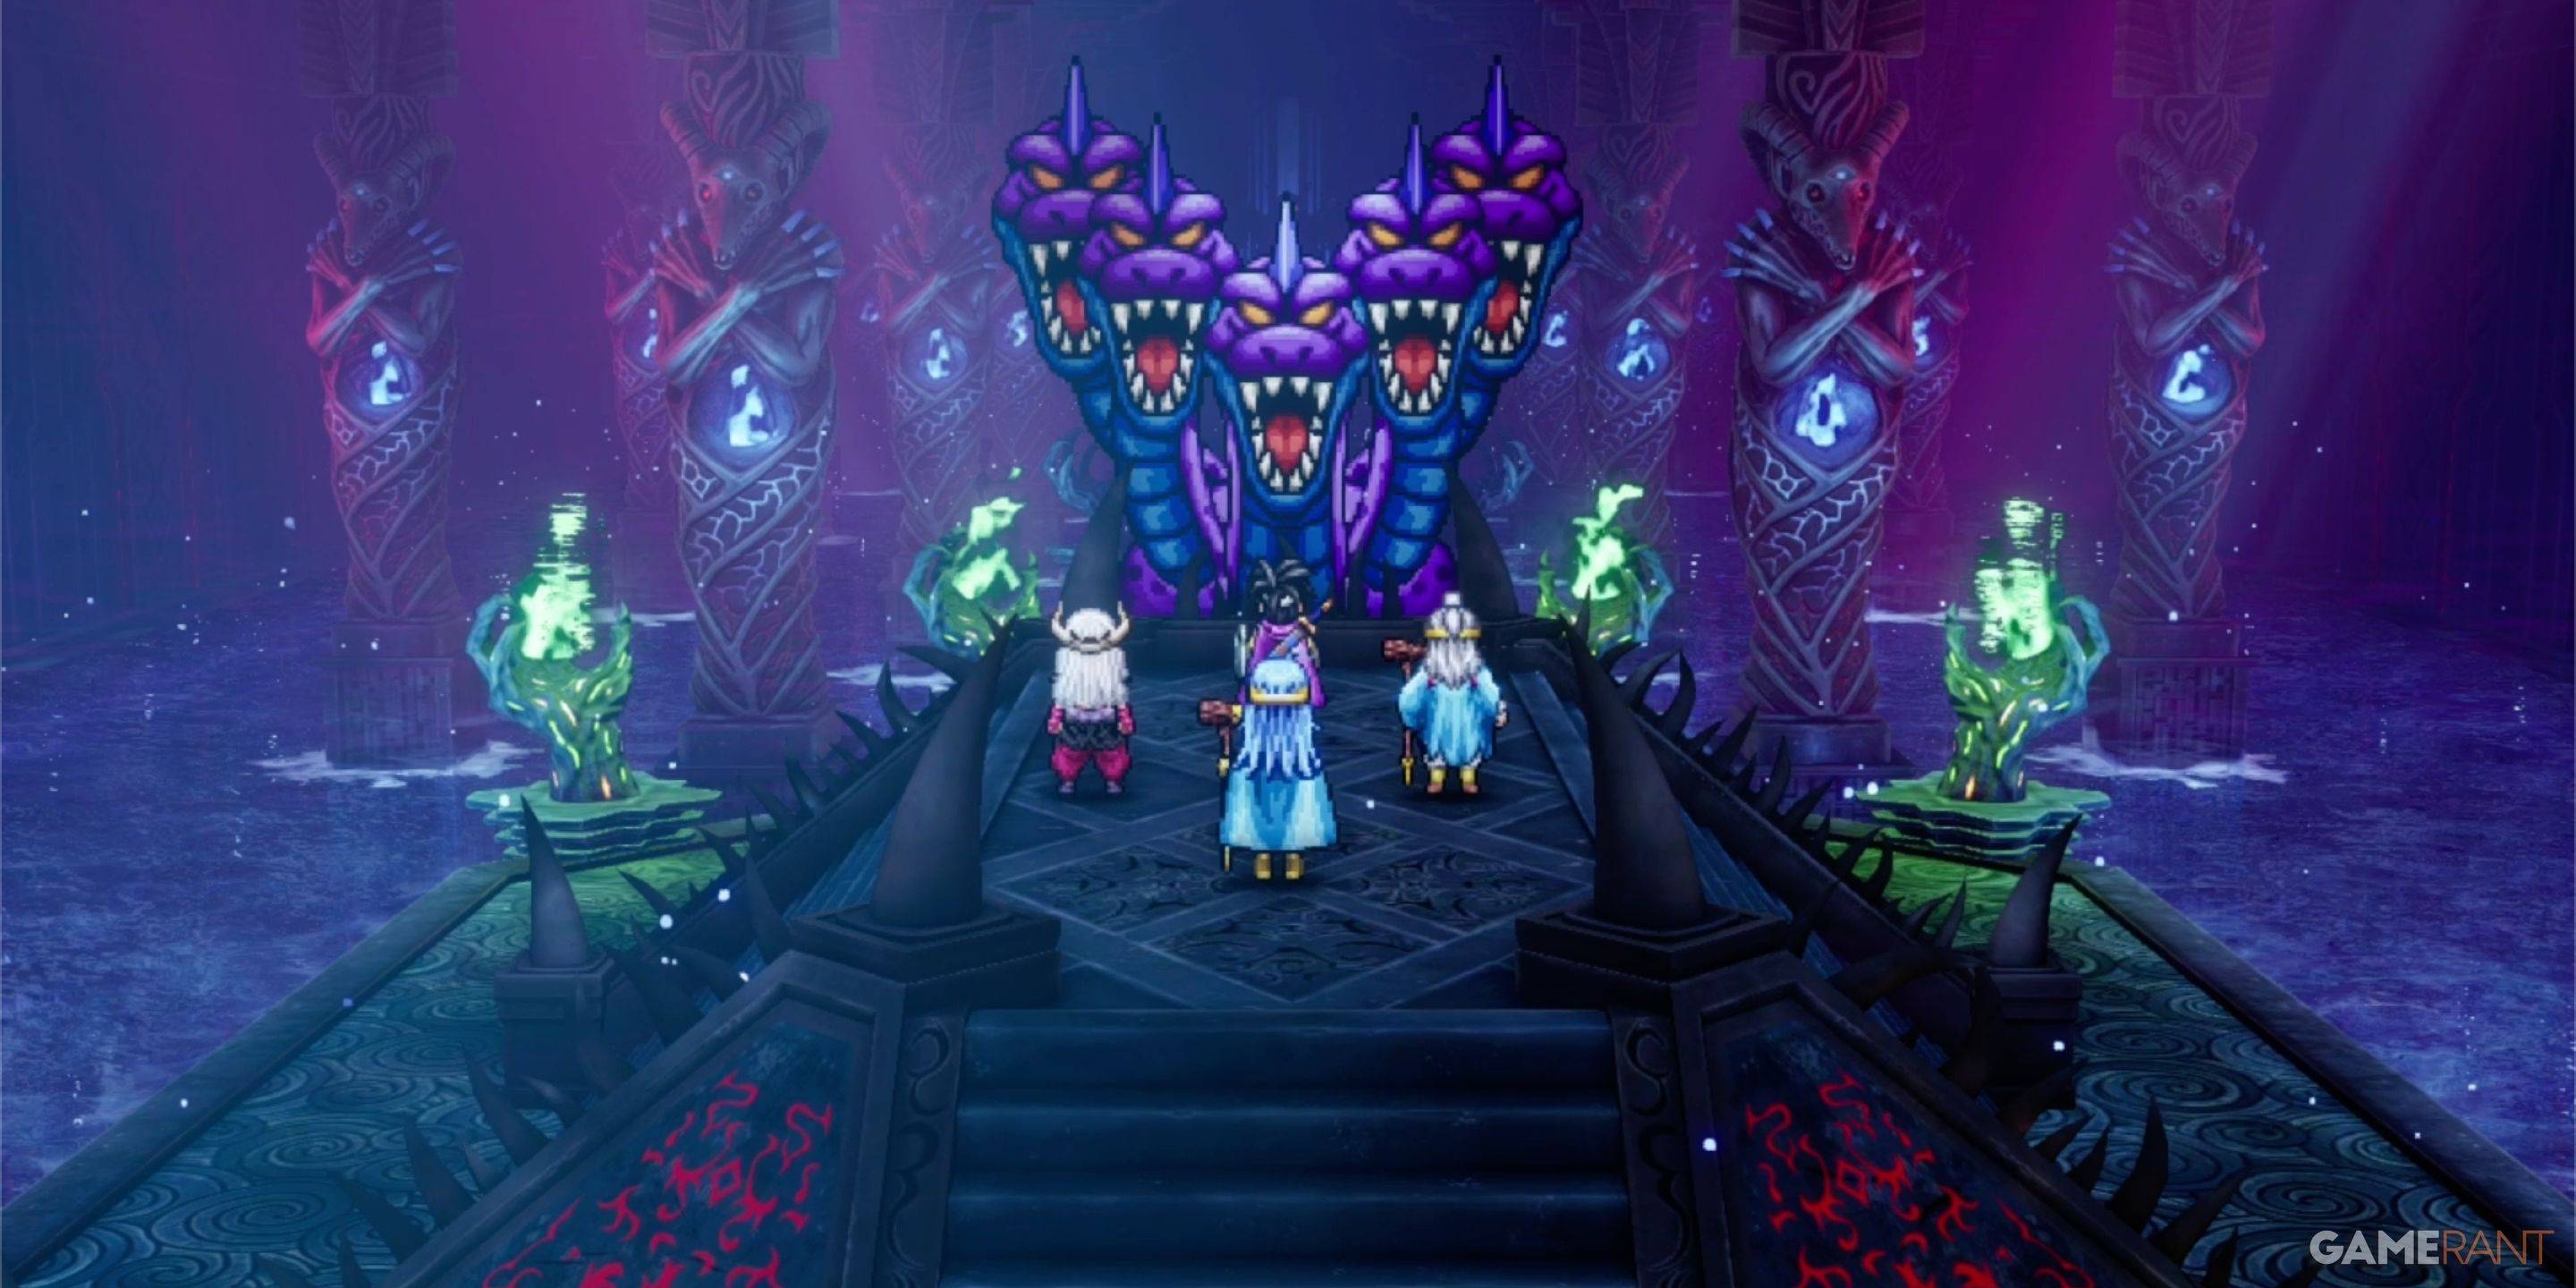 This formidable foe is akin to a low-level main boss. While it has no specific weaknesses, the Kazap spell proved highly effective, dealing over 400 damage per turn. An aggressive approach is beneficial, as the King Hydra regenerates about 100 HP each round. Employ a standard boss strategy, using a Sage as a dedicated healer if possible.
How to Defeat the Soul of Baramos:
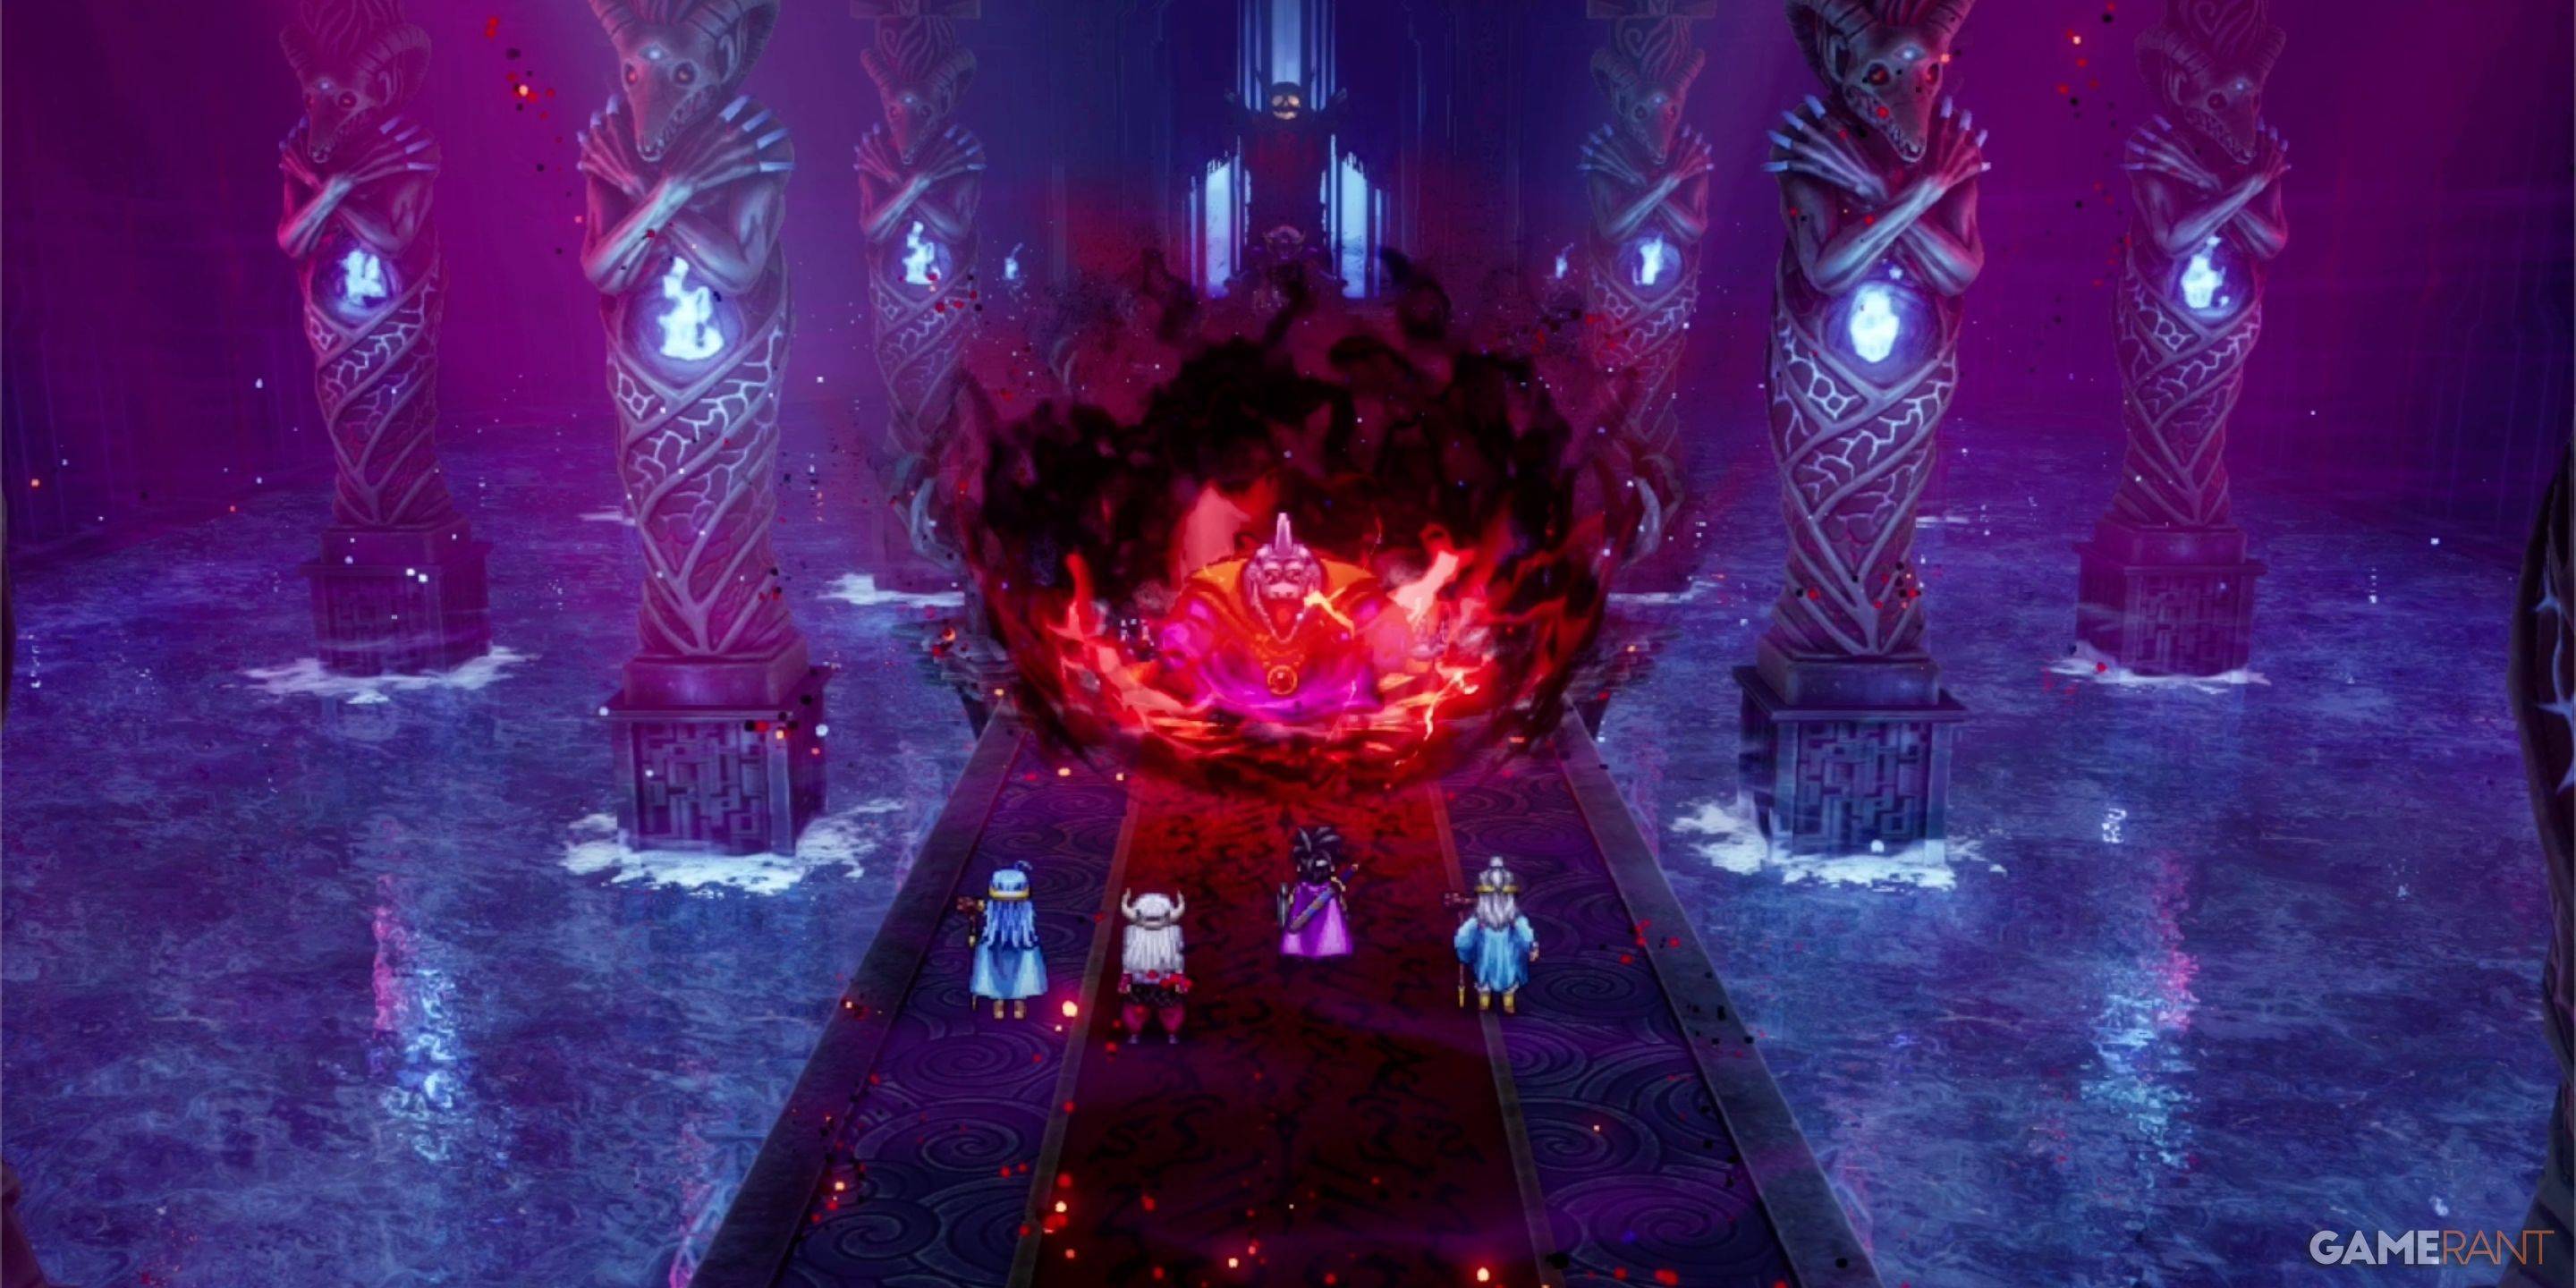 Having faced this enemy in the Tower of Rubiss, you'll know it's vulnerable to Zap damage. Focus your Hero on using Kazap for maximum impact.
How to Defeat the Bones of Baramos:
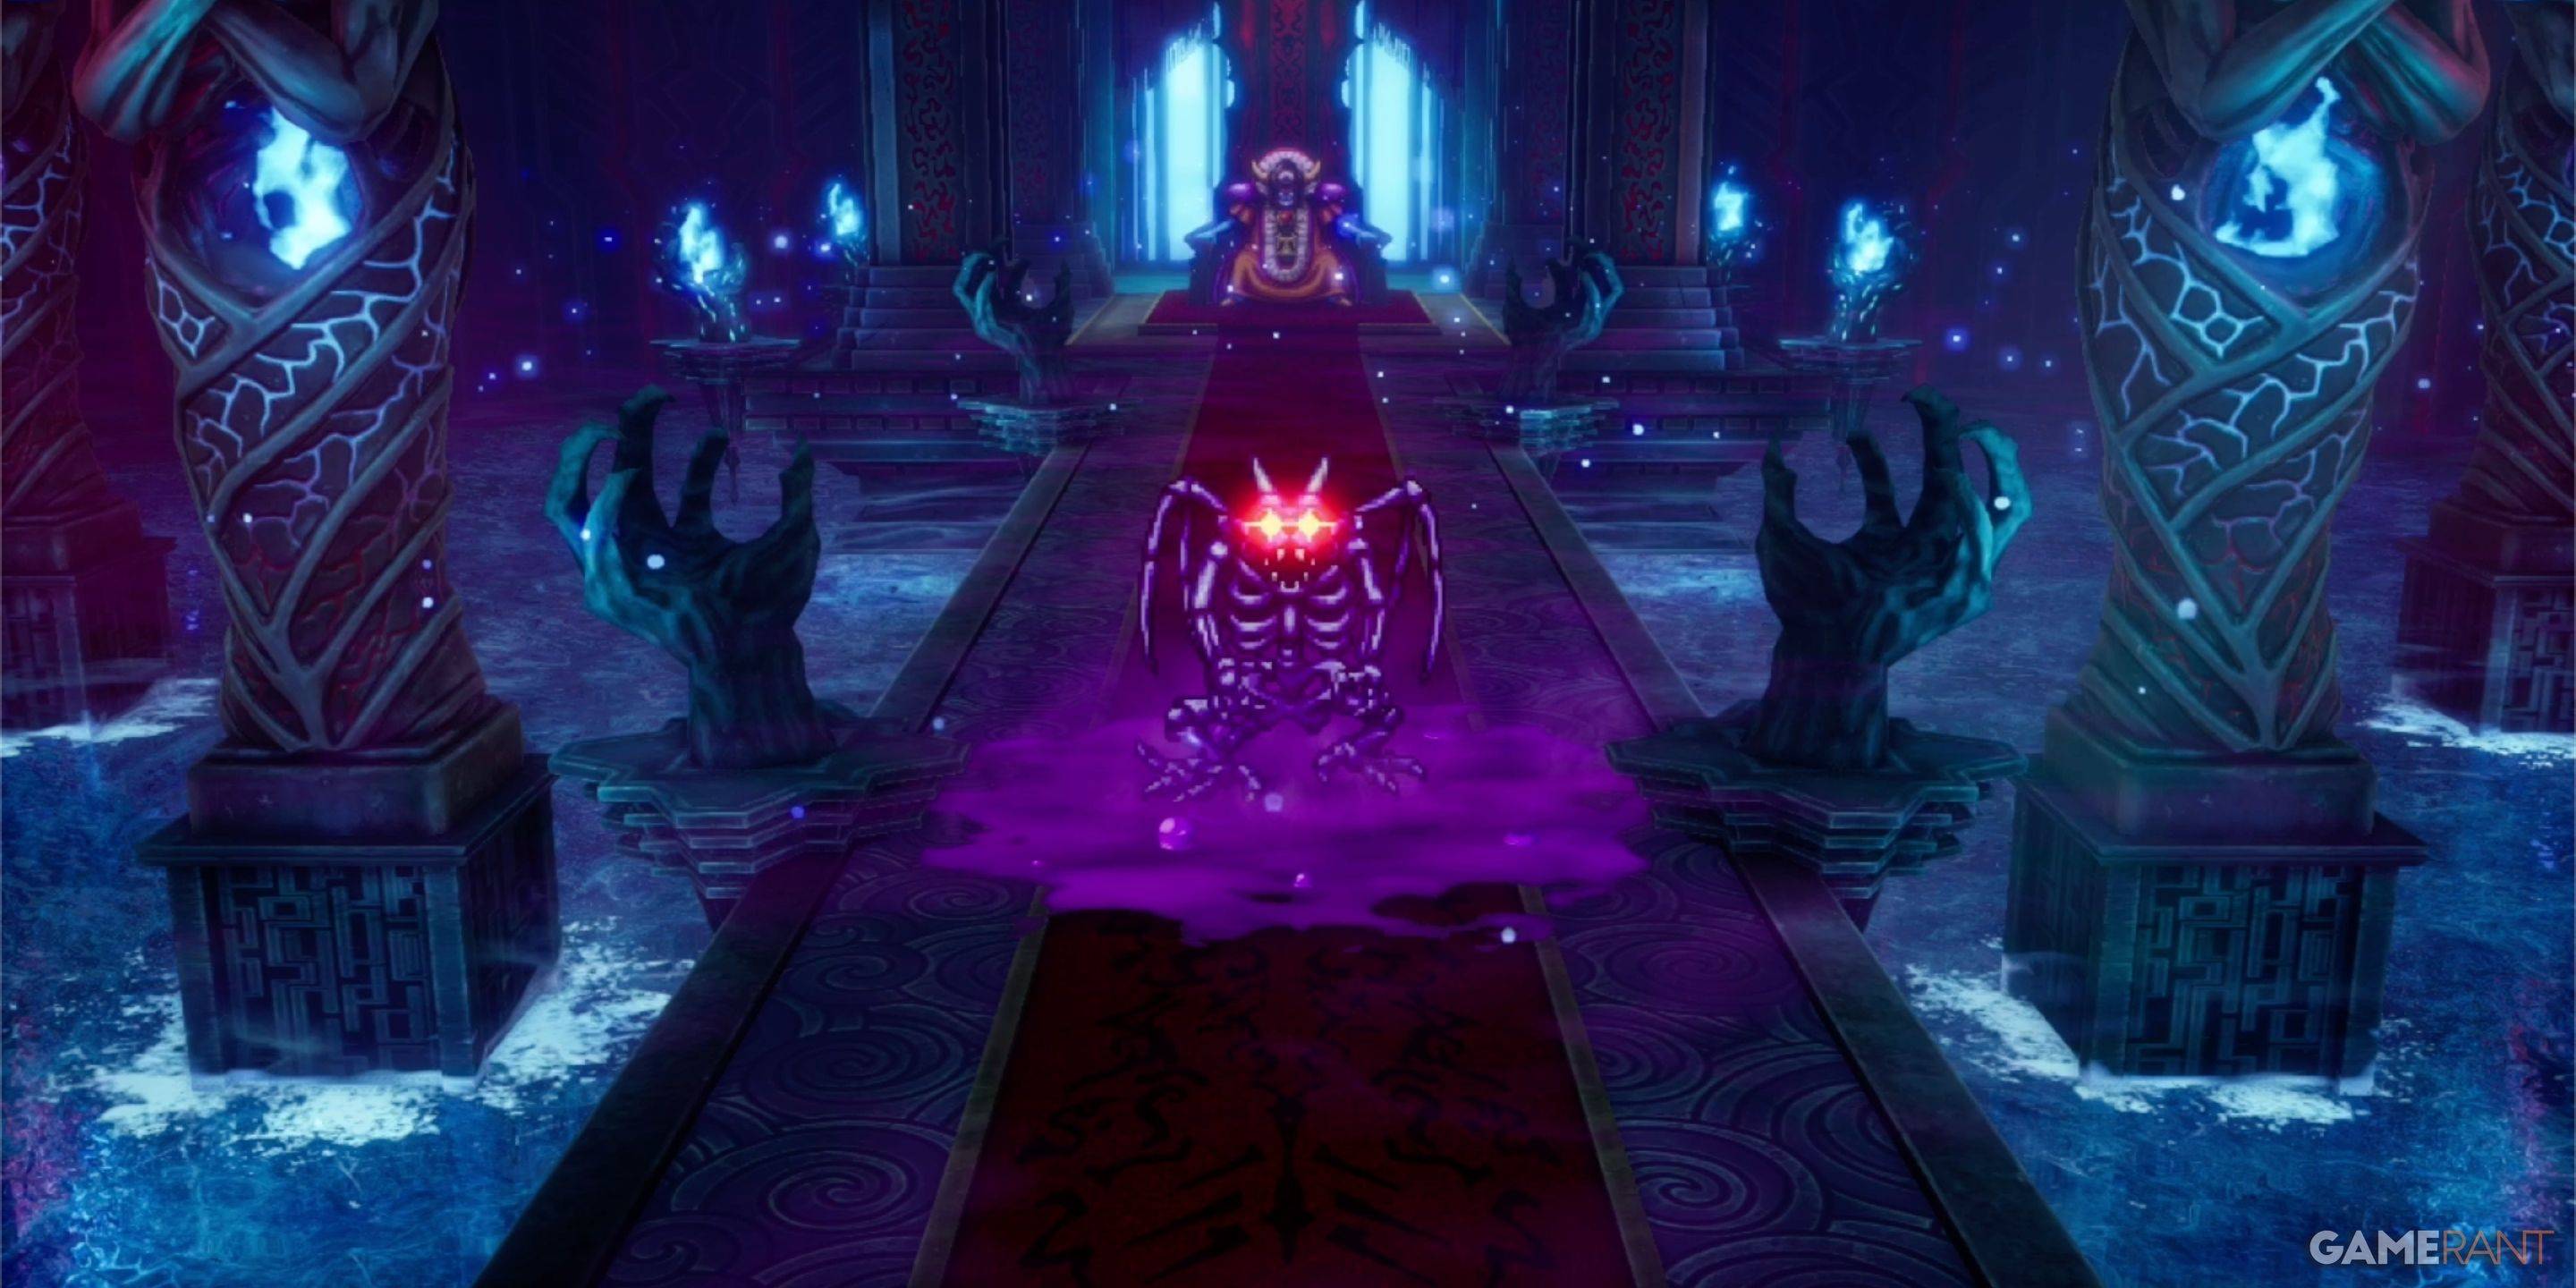 This enemy shares similar weaknesses to its earlier incarnation. Employ Kazap and the Monster Wrangler's Wild Side/Monster Pile-On combo for a swift victory. Be mindful of the Bones' increased damage output compared to the Soul of Baramos.
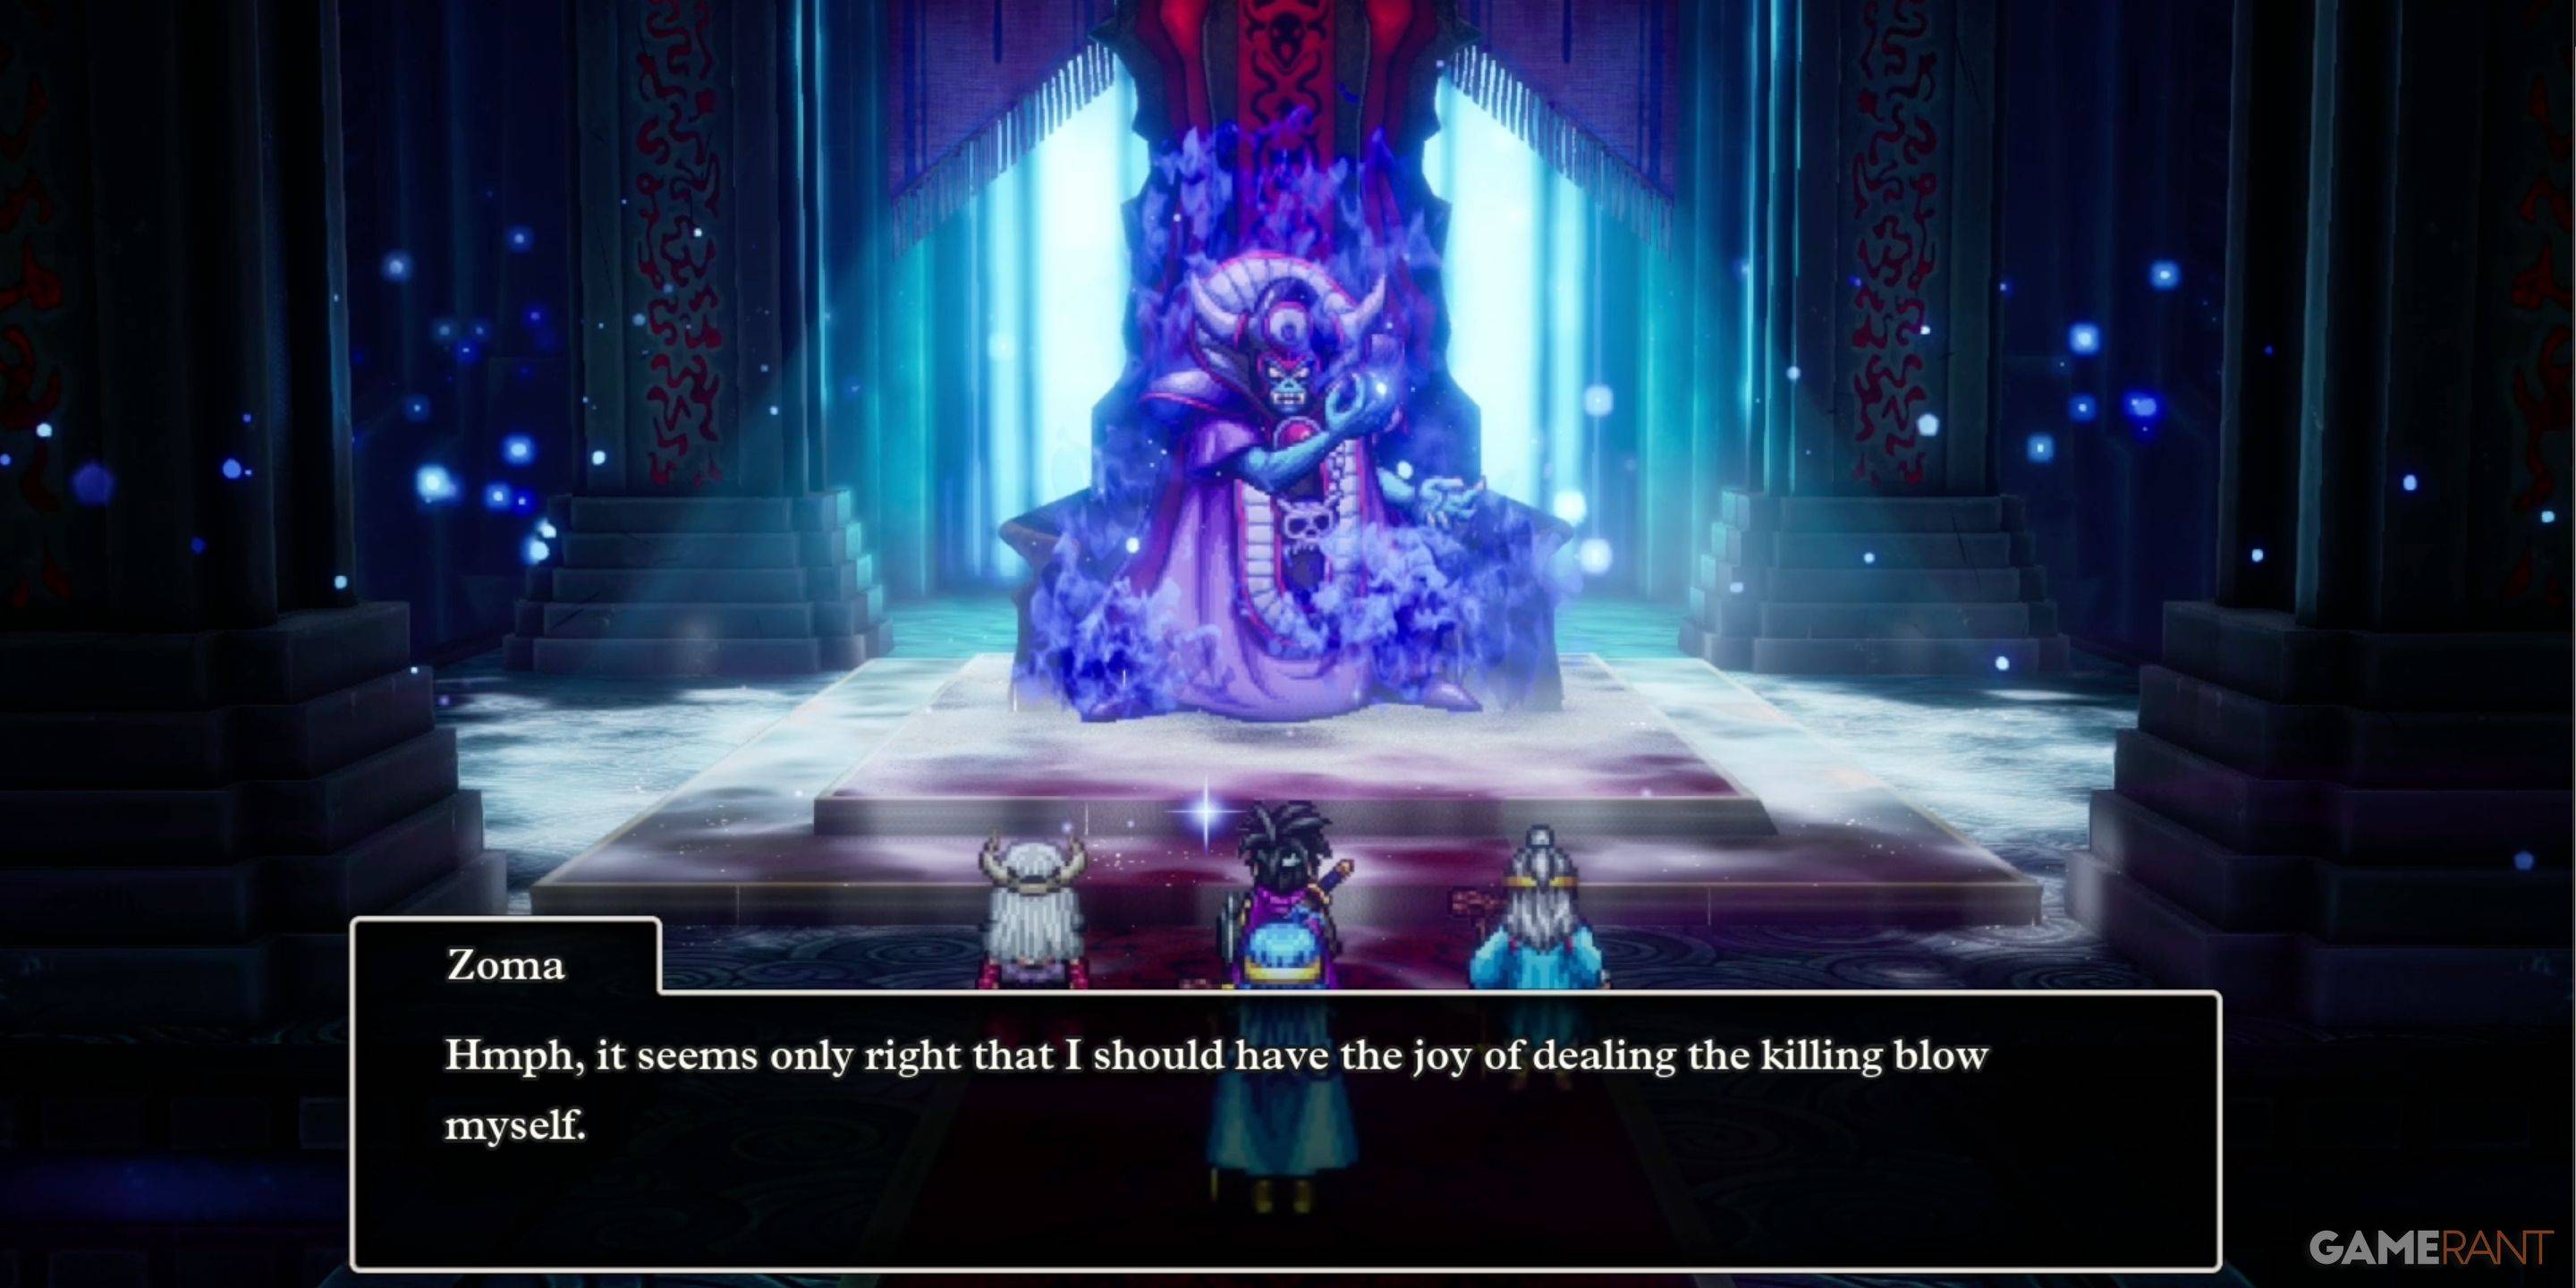
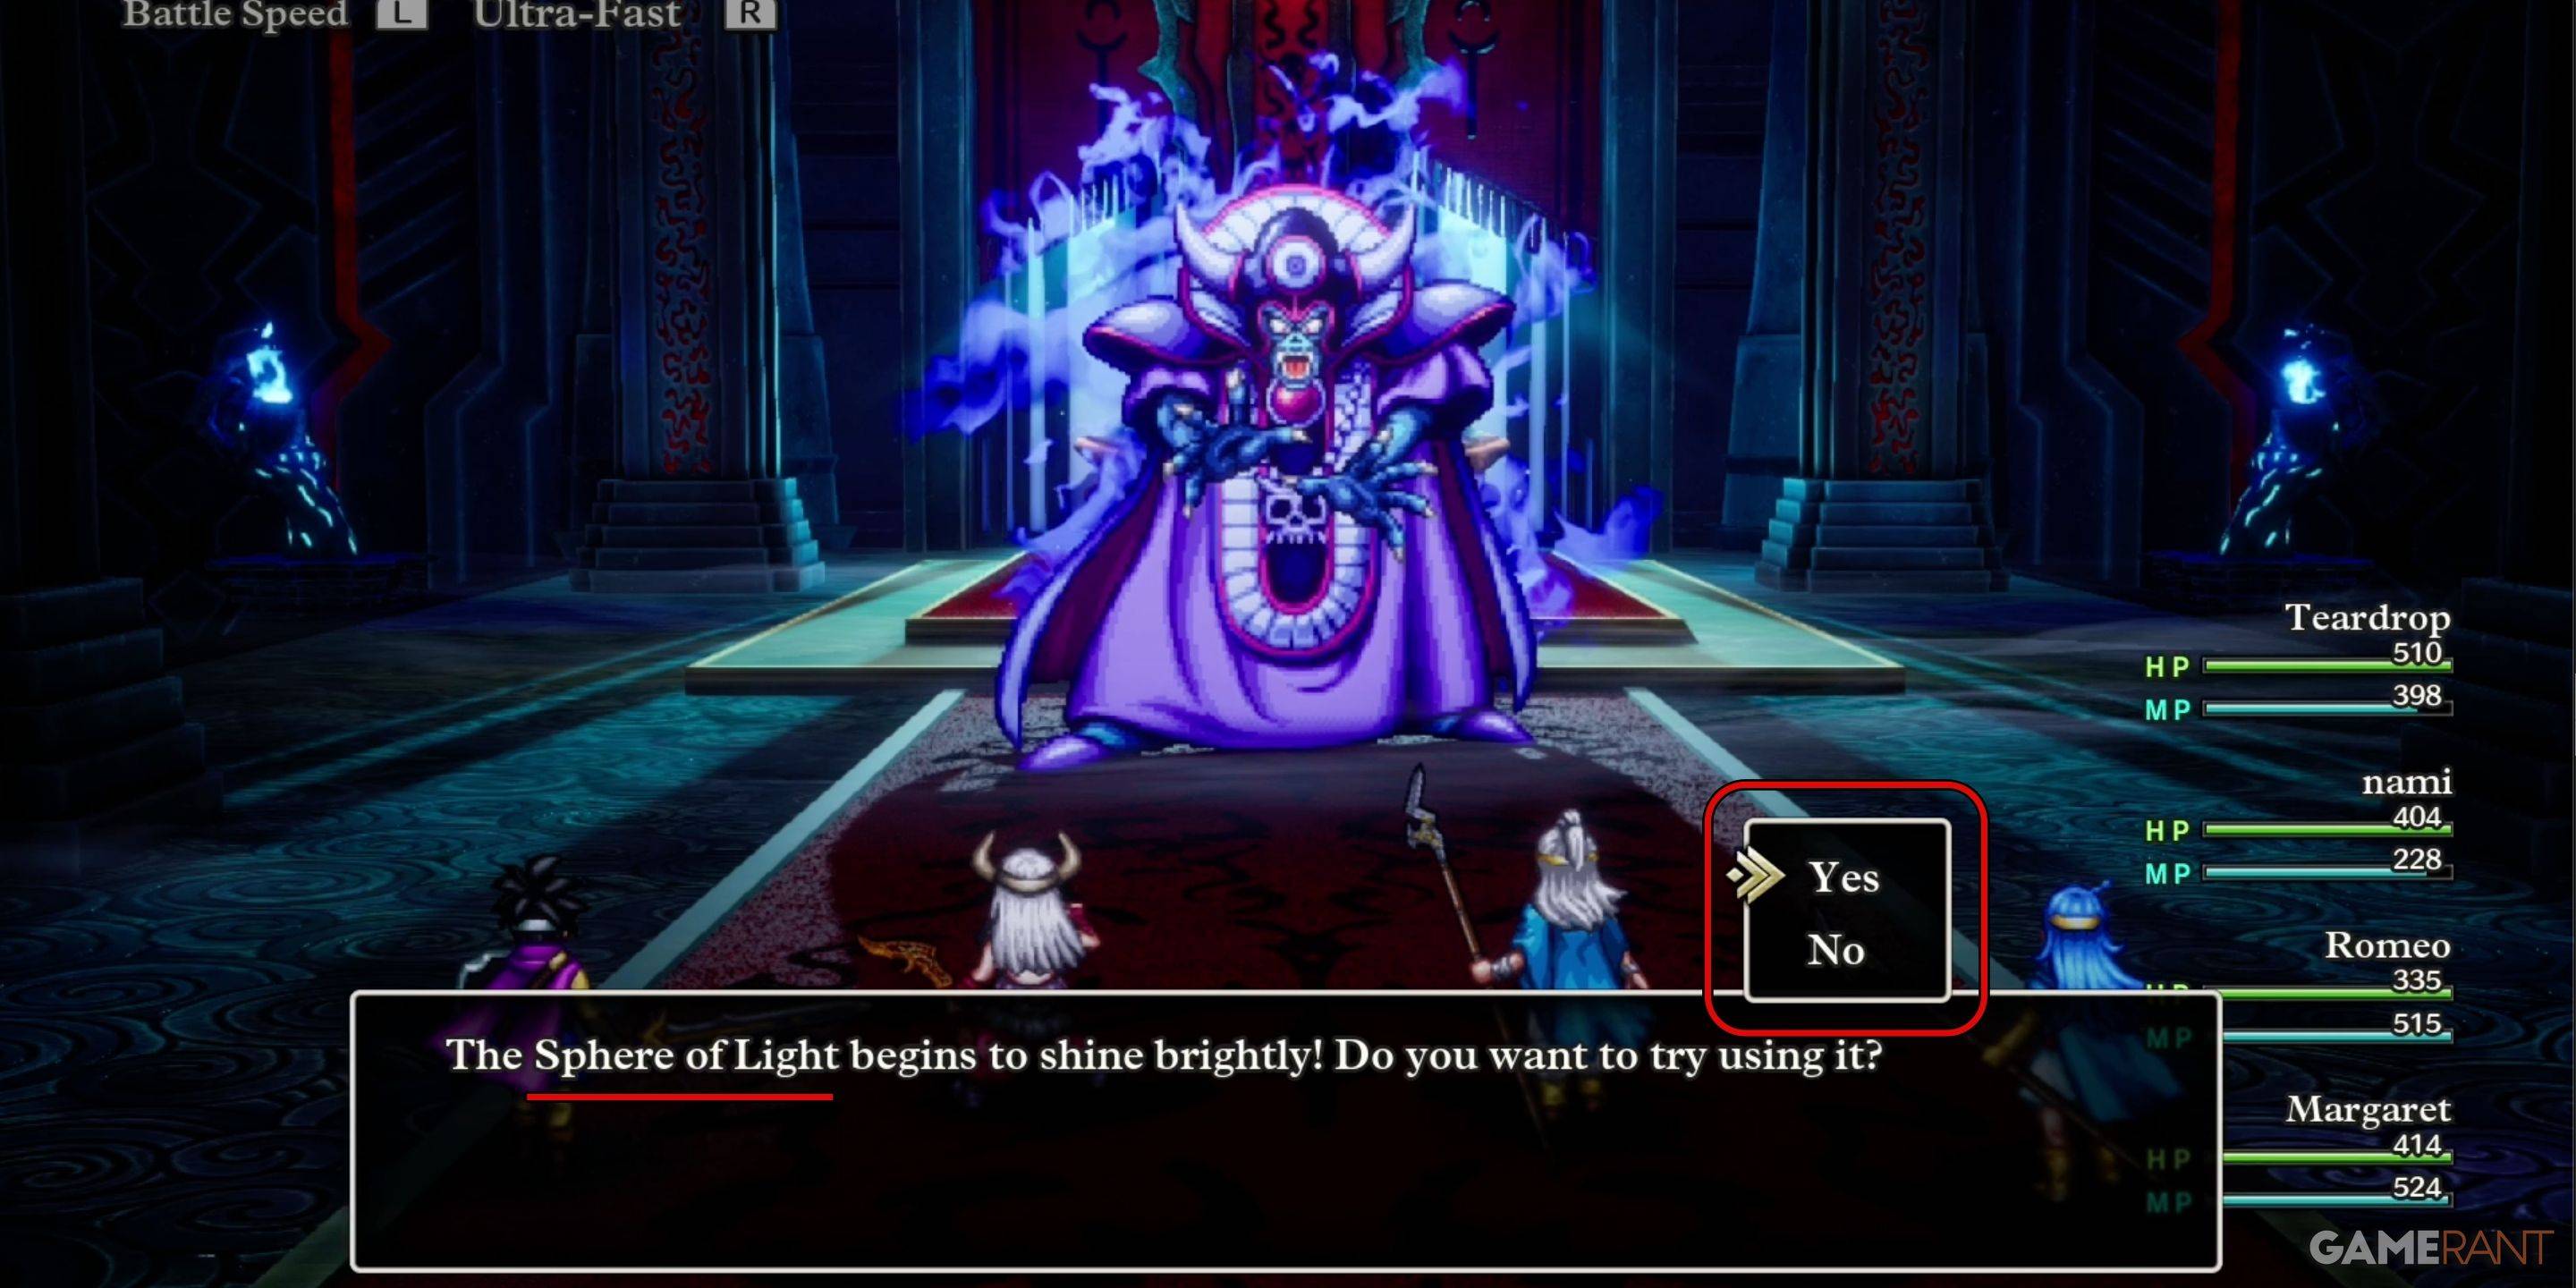
How to Defeat Zoma in Dragon Quest 3 Remake:
Zoma, the final boss of the main story, demands a strategic approach. Avoid being overly aggressive, as Zoma begins with a magic barrier that diminishes the effectiveness of magic attacks. Conserve your MP until prompted to use the Sphere of Light, which will remove the barrier.
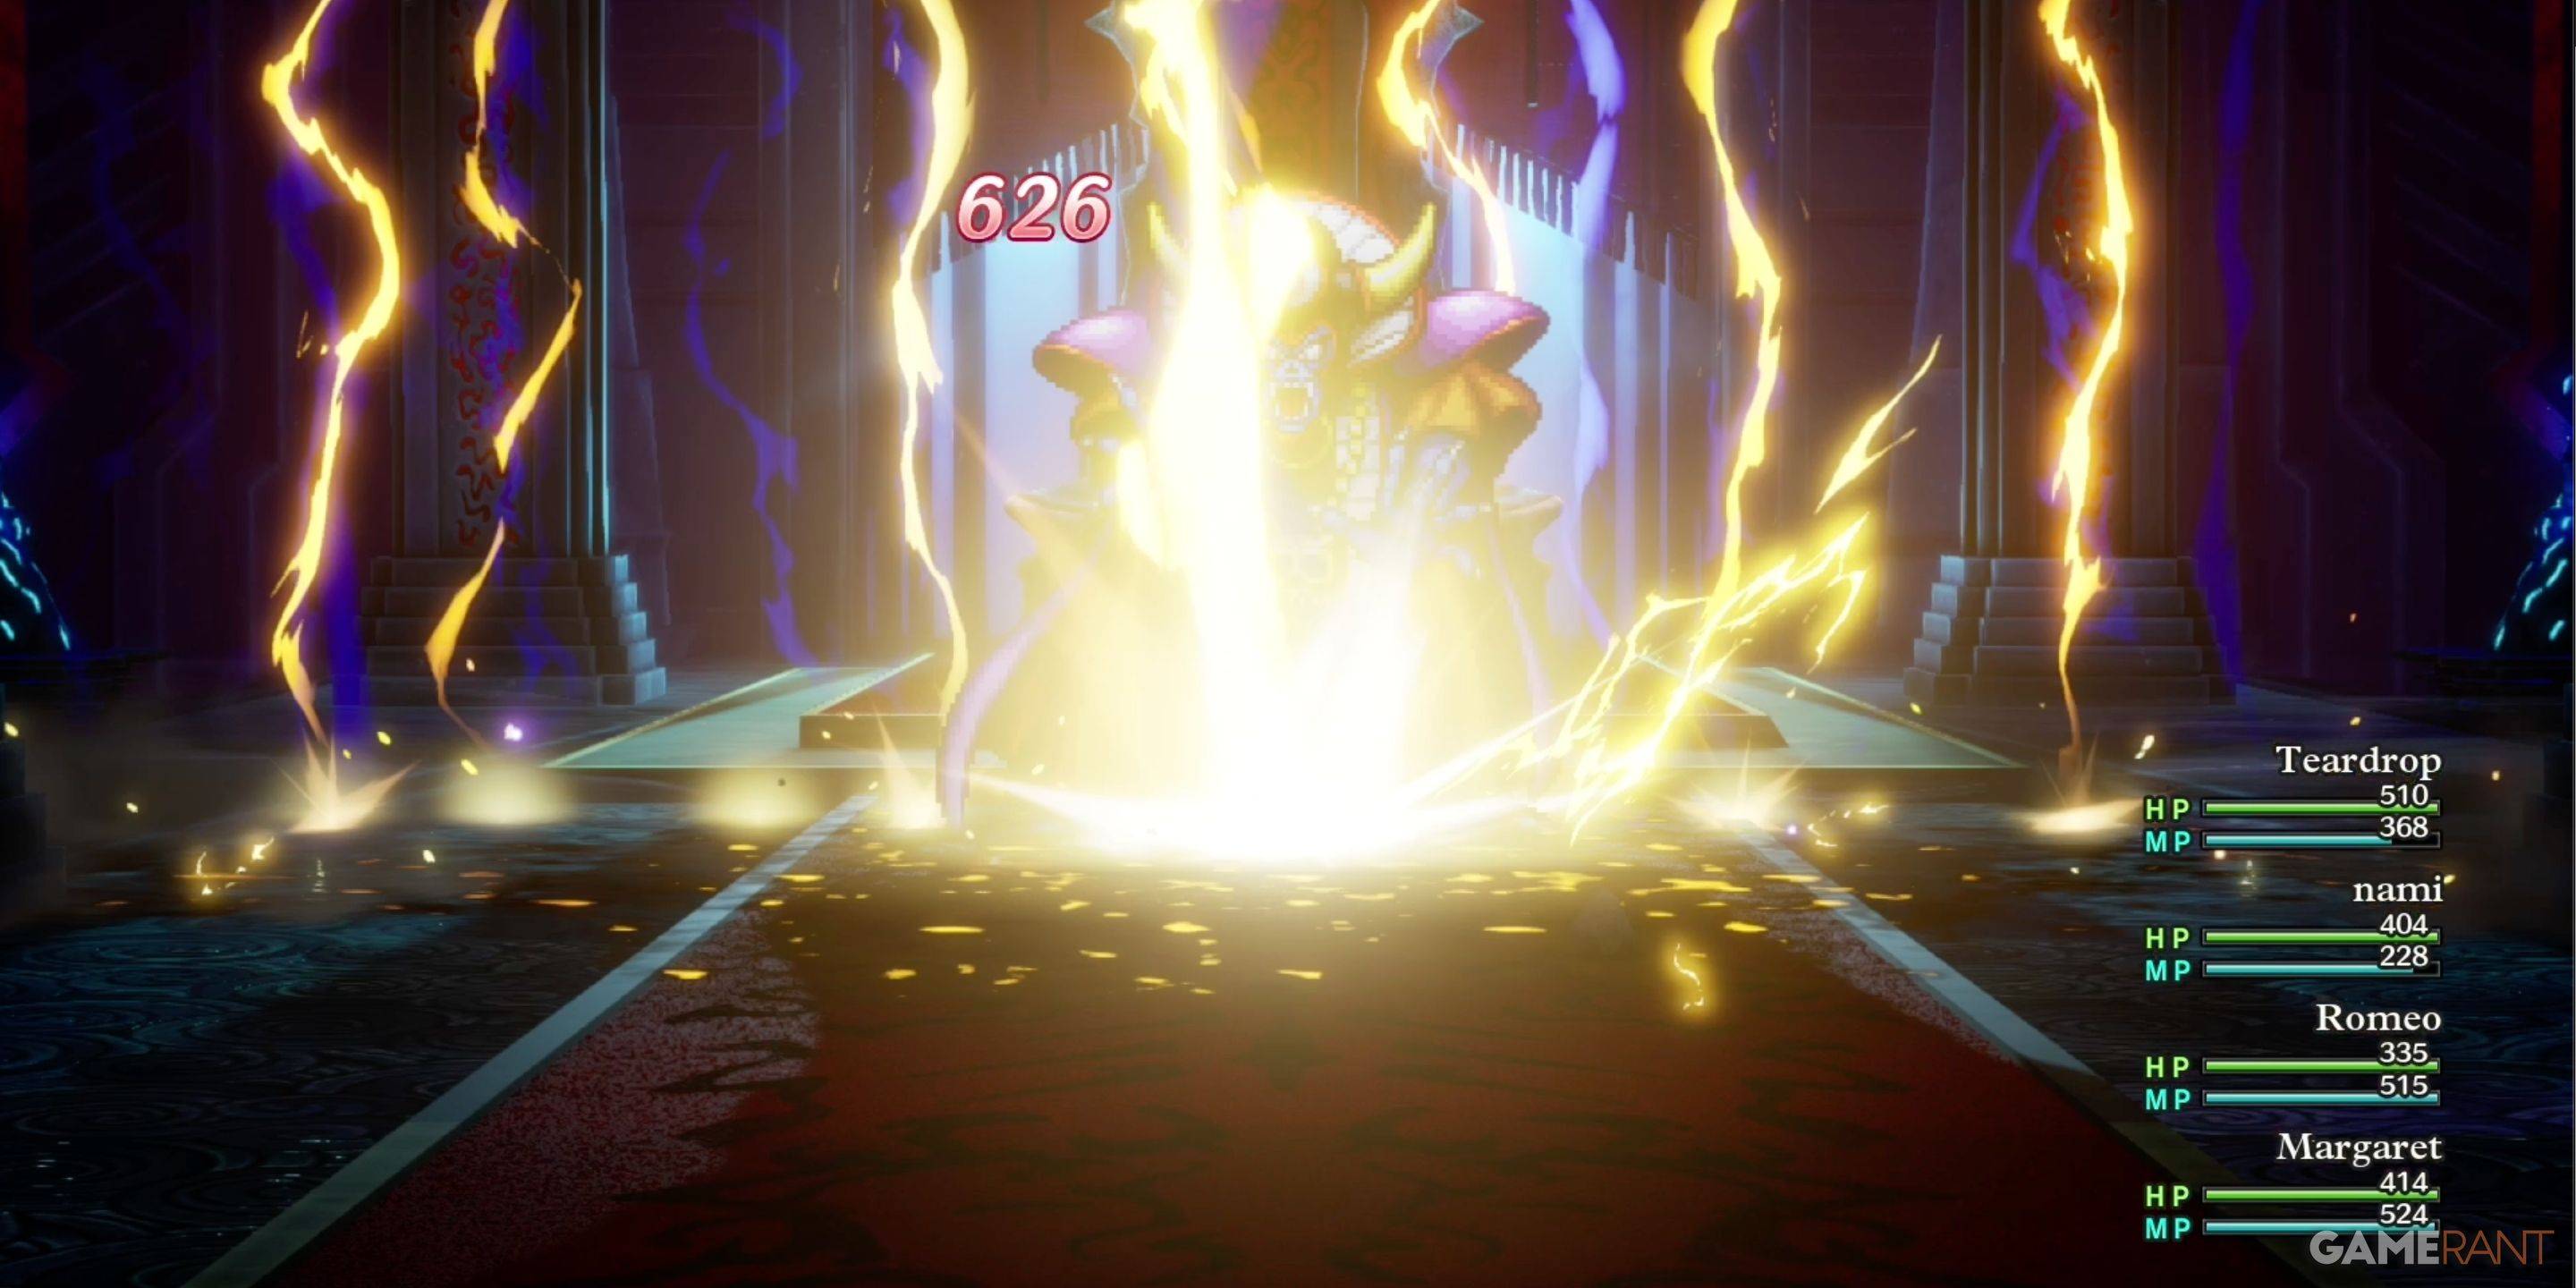 Once the barrier is down, Zoma becomes vulnerable to Zap attacks. Our Kazap dealt over 650 damage per hit. Utilize the Kazap and Monster Wrangler combo, with the other two party members focusing on healing and reviving. Buffs, debuffs, and damage-reflecting equipment can be particularly useful. Take your time, prioritize your party's health, and you'll emerge victorious.
Every Monster in Zoma's Citadel – Dragon Quest 3 Remake
| Monster Name | Weakness |
|---|---|
| Dragon Zombie | None |
| Franticore | None |
| Great Troll | Zap |
| Green Dragon | None |
| Hocus-Poker | None |
| Hydra | None |
| Infernal Serpent | None |
| One-Man Army | Zap |
| Soaring Scourger | Zap |
| Troobloovoodoo | Zap |